News
Best Cellular Trail Camera (Buying Guide)
https://unsplash.com/photos/0DCnT37wevk
The best trail cameras are camouflaged perfectly into the natural environment
The hunting enthusiasts among you will know that sometimes a hunting excursion can be frustrating. Although the traditional methods for tracking and monitoring wildlife are necessary skills for hunters, and for all of us to either aid in wildlife spotting or to keep us safe on primitive camping excursions from wild animals, modern technology has made the whole experience that much easier.
Cellular trail cameras allow you to monitor deer and other animals around you, your property or your favorite hiking and hunting spot, without even leaving the comfort of your home. Instead of tracking for hours, or waiting out for animals to arrive, a wireless trail camera allows you to monitor these animals all day long. And the best part is you can do it remotely! Whether you’re looking to protect your property, get a rare sighting of an endangered species, or for a hunting camera, cellular trail cameras let you monitor wildlife 24/7.
But, how is this possible? Cellular trail cameras aren’t a bit like the traditional digital camera. Cellular cameras are always connected, just like us. Using 3G, 4G, 5G or a different cellular network, cellular cameras transmit data over specific networks, all with the purpose to monitor the activities of wildlife. To make sure this data is always transferred, you’ll need to get a cellular trail camera plan, or a SIM card, before using them.
There are a few factors that make cellular cameras unique. The first is that most are fitted with a motion sensor, which captures any significant motion. This means that when the deer you’re trying to monitor jump in front of the lens, an image is recorded in the camera, and a notification is sent immediately to your phone. Because cellular trail cameras are usually used in a natural environment, to monitor wildlife, they are usually wireless, battery-powered or solar-powered. The best cellular trail camera for you is one that fits your unique needs and requirements. Read on to find it.
https://unsplash.com/photos/LfaN1gswV5c
Cellular trail cameras can be used for surveillance, or hunting
Moultrie Mobile XV7000i Cellular Trail Camera | Verizon Network
The first thing you might notice about this wireless camera is its unique appearance. The camouflaged casing of this camera appears to look like bark, meaning it can easily be attached to a tree, and won’t draw any attention to it. This will mean it’s less likely for an animal to notice anything untoward, or damage the camera while in situ. With a khaki-colored strap, this camera will visually melt into its natural environment.
With a 20 megapixel camera, this option is top of the range when it comes to image quality. The Moultrie Mobile XV-7000i, Moultrie LTE, and Moultrie Verizon run on Verizon’s 4G network, which will send images direct to your phone, laptop or iPad. With industry-leading coverage, no matter if you’re whether tracking game in your back yard or the deep woods, this network is used by hunters and game managers all over the USA.
One of the best features of this cellular camera is the Moultrie Mobile app, which can be used on android and iPhones. All you need to do is download the app, to receive images, laid out clearly, right to your smartphone or tablet. And with excellent specialized image sensors, the leading ILLUMI-NIGHT 2 Sensor, you can take incredible night time images. This is especially important when it comes to cellular cameras, as many game animals are most active during the cover of darkness, rather than during the day.
Pros:
- Bark appearance camouflage
- 20-megapixel camera
- Good flash range
- Is connected to Verizon’s industry-leading 4G network, with excellent coverage
- Specialized sensors to capture incredibly clear nighttime images
- Long battery life, using 12 AA batteries
Cons:
- Sensitivity is very high, with potential for false triggers
- Battery life decreases over time
As was previously mentioned, night vision for cellular game cameras is a very important feature As most of the movement of the game happens during the night, these are a few hours where you really can’t afford to lose out on images. And this is where this option wins. Creative XP 3G cameras feature full HD night vision, with an incredible 65-foot range, and records 1080P video, and 12-megapixel photos both during the day and the night time. Although The quality of images here isn’t as high as with some models, you might think it’s worth the sacrifice for the unique night filming feature, and the amazing range of this camera.
Another great feature of this option is the easy and cheap data plan. With a free SIM card, which uses AT and T cell towers, the set up is as easy as one, two, three. Receive the SIM card and install it, pay just 8 dollars for 1500 photos and activate it adding your phone or email address, and wait for the deer or trespasser to activate the motion activated PIR sensor. Easy!
When looking at cellular trail cameras, and security cameras, one of the features you need to pay attention to is the trigger. This indicates how quickly the camera will respond, and thus, how many pictures you’re likely to get when motion is detected. Creative XP has a super quick 0.4-second trigger, meaning you’re likely to capture one to five photos per trigger. This camera also has a super wide dynamic lens with a 110 degree PIR angle, meaning this camera will capture images that for other models might well be out of range.
Pros:
- 65-foot range
- Superior night video recording
- Easy and cheap set up and data plan
- Super quick 0.4-second trigger which captures one to five pictures
- Super wide dynamic lens with 110 degrees PIR angle
Cons:
- No app, to make the storing and viewing of images clearer and more organized
- 12-megapixel camera, which isn’t as clear as some other models
For a slightly cheaper option of a cellular trail camera, why not check out this one by Spypoint. This is a great option for those who have less demanding surveillance needs, such as for use on private property, or in an area with less chance of constant motion detection. What makes this camera unique is its size: it’s the smallest on the market. This could also be very useful for you if it’s necessary that your camera be almost undetectable.
However, this does come with its drawbacks. With only 8 AA batteries, and containing just a MicroSD card, this camera will not perform for as long, or capture as many images over a long period of time, as some of the other models reviewed. It’s best for those with less demanding needs, rather than tracking wildlife from a long distance for professionals or serious hunting enthusiasts. Also, with 4G photo transmission, which works with LINK-MICRO-V only, you might find that the coverage performance doesn’t suit your needs.
Another drawback of this model is that the image quality isn’t as impressive as other cellular trail cameras. With only 10 megapixels, you might not be satisfied with the images that are sent directly to your phone or laptop. For property surveillance, however, this is all you really need and could save you some money too. We wouldn’t recommend this option for serious hunters, as the infrared night time vision isn’t up to par with some of the more specialized models meaning you might miss some coverage or have blurry images of game during the night.
Pros:
- Smallest on the market
- Good for private surveillance purposes
- Cheap
Cons:
- Only 10 megapixels
- Limited night photo caption ability
- Limited battery life with only 8 AA batteries
If you’re looking for another cheaper option of a cellular trail camera, don’t mind having a larger model, and want a higher spec camera, then Campark has you covered. With built-in WIFI and an APP function, this camera has loads of unique features that may tempt you. Firstly, you can check the camera angle on the phone and adjust the camera position remotely, making viewing photos and videos easier.
Furthermore, despite being one of the cheaper options out there, this model boasts a 20MP, helping you to record every moment of vivid wildlife & spectacular nature with rich details. Unlike some other models, it also has an impressive 1296P HD video resolution, making this a fantastic option for those of you who really want to capture a natural environment and the natural behavior of the animals in it. Even at night, the camera holds up its quality: with 36pc 850nm infrared LEDs ranging an impressive 65 foot (20m), this camera clearly shows you the night behavior of animals.
The Campark T80 Trail camera boasts built-in WIFI and app control functions. Download the app on your mobile phone, and then connect with WIFI, and watch the wonderful images of nature flow in from the comfort of your own home! You can adjust the settings of the camera and check the photo or video on your phone directly. One small price to pay with this camera is that the HD card or memory card is not included, so you’ll need to purchase that yourself. We would recommend purchasing your own 32GB SD card, which can be done relatively cheaply, and also allows you the chance to choose your favorite brand or capacity.
Pros:
- Cheap
- You can adjust the position and angle of the camera remotely, from an app on your phone
- Impressive 1296P HD video resolution
- An incredible 20m night detection range with great night vision
- Inbuilt wifi
Cons:
- Video length is only up to 60 seconds
- Doesn’t come with an SD card
- No time-lapse
Stealth Cam GX Cellular Series 22MP 100FT Infrared Rang Remote Mobile App Camera
This model by Stealth Cam is a heavy-duty, high performing cellular trail camera, that certainly isn’t the right option for those of you looking to save some cash. However, it’s industry-leading spec could be worth your investment. And here’s why. One winning factor of this camera is the 22-megapixel camera. If the quality of image is the number one feature you’re looking for in a cellular camera, then look no further. 22 megapixels really is top of the range, there aren’t many models out there that will offer you better quality pictures than this, making it the perfect option for wildlife photographers and enthusiasts.
And that’s not the only area where this high spec model delivers. With 42 NO GLO IR Emitters, producing 100ft of infrared light that will not alert or spook your game, you’ll be able to capture images of wildlife from further away than most other cellular cameras. With a reflex trigger of .5 seconds, Matrix Advanced Blur technology, and Retina Low Light sensitivity, every event is captured quickly and clearly.
We would recommend this camera to those of you who want to monitor a large area or multiple different kinds of wildlife. Stealth Cam comes with a super useful app, that allows you to control all of your GX devices from one device, like a cell phone. The home screen dashboard usefully displays cell signal, image count, battery level and memory card usage. Here you can also view all of the lastest transmitted images, create and manage galleries, delete images and pinch and zoom images. With its navigation assistance, you can also take a test photo to check the camera is working, and it will send you notifications if the battery or SD card is low.
Pros:
- Top of the range 22-megapixel camera
- 42 NO GLO IR Emitters, producing 100ft of infrared light that will not alert or spook your game
- Matrix Advanced Blur technology
- Retina Low Light sensitivity
- Comes with a useful app which allows you to manage all of your cameras and images from one device
Cons:
- Connection issues sometimes over time
- Quite expensive
- No solar panel
Bushnell Impulse 20MP Cellular No Glow Trail Camera
This AT&T-specific camera is one of the best wireless trail cameras, that won’t break the bank. Some of the unique features of this model include a 1-second image recovery, weather data image tags, and anti-theft mode. The 1-second image recovery time feature is especially useful for those looking for a cellular trail camera for hunting, as it means you can quickly notice any game near your cameras, and head off on your adventure.
This option is also ideal for DSLR and interchangeable-lens cameras and high-performance camcorders, making it a great option for wildlife photographers, or those nature enthusiasts who want to capture stellar images of natural environments. Another benefit of this model is its speed. With up to 40MB/s write speeds for faster shot-to-shot performance, and up to 90 MB/s read speeds for faster transfer, a super fast trigger speed which means you’ll be able to catch multiple images for every sensor trigger, and they will be delivered to your device in lightning quick time.
This camera also boasts a really strong memory capacity. With a high-performance SD card with both video speed Class (V30) and UHS Speed Class 3 (U3) ratings, you’ll be able to capture incredible 4K UHD and full HD video, bringing you fantastic picture quality. This is one of the unique features of this camera, where some other models fall short, with this one you can both capture stunning videos, and store a large amount of them without having to worry about your SD card filling up. However, some people report that the performance of this camera is not always reliable, so as long as you’re willing to take a risk, it could be great for you!
Pros:
- 1-second image recovery
- Weather data image tags
- Anti-theft mode
- 40MB/s write speeds for faster shot-to-shot performance
- Capture incredible 4K UHD and Full HD video
Cons:
- Questionable reliability
- Difficult setup
- Sometimes does not pick up cellular signal
Our winner:
Our winner for the best trail camera on Amazon is the Stealth Cam GX Cellular Series 22MP. This camera not only boasts an impressive 22 megapixels, it’s also the best for all round surveillance and managing a large property or monitoring wildlife over a large area. Its apo allows you to view all of your cameras simultaneously on one device, and lets you track their battery and SD cards too. For covert wildlife, hiding in the bushes, the long range of this camera allows you to survey a large area and pick up movement from far away.
https://unsplash.com/photos/v8ppsvUTwGE
Think about what kind of SD card you need
These trail camera reviews will help you to find the best cellular trail camera for you. Whether you’re looking to protect your property from theft, survey a large area for hunting, or capture stunning images and videos of wildlife in the dark, we’ve provided an option for your unique set of needs. And the real beauty of all of these options is that they allow you to observe stunning wildlife, and game, right from the comfort of your own home!
Bonus tip:
Watch this useful video, to find out how to set up your cellular trail camera
https://www.youtube.com/watch?v=eZ_7c9d9WHs

Hiking is an enjoyable and rewarding activity, but it can also be physically demanding. To ensure you have the energy to make it to the top of your next peak or trail, you need to bring along snacks that will provide you with sustained energy throughout your hike.
But what are the best snacks for a hike? There are many different factors at play when choosing snacks for a hike: nutritional value, ease of packing and storage, convenience when eating on-the-go, etc.
In this article we’ll discuss what types of snacks are best for a hike, how to choose healthy and nutritious ones that provide energy, ideas for easy-to-pack snacks that don’t require refrigeration or heating, how to store food safely while on a hike as well as tips on when and how often should you eat and drink during your trek. So let’s get started!
How to Choose Healthy Snacks for a Hike
When selecting snacks for a hike, it’s to choose ones that are rich in both carbohydrates and proteins. Carbohydrates will give you energy while proteins help your muscles recover after exercise. Aim to pack snacks that have natural sources of carbohydrates like grains, fruits, vegetables and nuts as well as protein-rich options such as meats, dairy products, beans and legumes. Try to stay away from processed foods with added sugars or artificial ingredients.
Easy-to-Pack Snacks That Don’t Require Refrigeration or Heating
Snacking on the trail doesn’t require any elaborate preparation – there are plenty of delicious snacks that don’t require refrigeration or heating. Here are some great snack ideas for your hike:
- Whole wheat sandwiches filled with nut butter and sliced fruits or vegetables, such as apples, carrots or cucumbers.
- Nuts and seeds like almonds, walnuts, cashews, peanuts and sunflower seeds.
- Fruits like bananas, oranges and grapes are easy to pack and carry along the trail.
- Energy bars that contain natural ingredients like oats, honey and dried fruits are a great source of energy when you’re on-the-go.
- Trail mix – a combination of nuts, dried fruit and other snacks makes an excellent hiking fuel.
How to Store Food Safely While on a Hike
When you’re out in the wilderness, it’s important to take steps to properly store your food. This will keep animals away and help to prevent contamination. Here are some tips for storing food safely while on a hike:
- Pack snacks into sealable plastic bags or containers that can be securely closed.
- Hang the bags or containers from a tree branch at least 10 feet above ground.
- Keep food away from your sleeping area by at least 200 feet.
- When returning home, dispose of any remnants of food in trash receptacles only – never leave them along hiking trails!
When to Eat and Drink During a Hike
In order to stay hydrated and energized on your hike, it’s important to plan ahead. Eating small snacks throughout the day will help keep your energy levels up, so it’s a good idea to pack more than you think you need.
It’s also important to drink plenty of water when out in the wilderness – dehydration can lead to fatigue and impair physical performance. Drink water every 15 minutes while hiking and take regular breaks during the day in order to refuel with food and fluids.
See also: How to Pack for a Day Hike
Benefits of Bringing Good Snacks on a Hike
Having nutritious snacks along your hike has many benefits:
- It helps maintain your energy levels by providing sustained fuel throughout the day.
- Nourishing snacks can help to prevent fatigue, muscle cramps and headaches caused by dehydration.
- Eating regularly helps your body recover quickly after exercise.
- It’s a great way to stay motivated and focused while on the trail.
Great Snack Options for Hikers
To recap, some of the best snacks to bring on a hike are ones that are nutritionally balanced and easy to pack and store. Some great snack options include: whole wheat sandwiches, nuts and seeds, fruits, energy bars and trail mix. Remember to drink plenty of water throughout the day in order to stay hydrated!
Conclusion
When it comes to packing snacks for a hike, it’s important to choose ones that provide both carbohydrates and proteins. Aim for snacks that are easy to pack and store, such as sandwiches, nuts and seeds, fruits, energy bars or trail mix. Don’t forget to stay hydrated with plenty of water throughout the day!
FAQs
Q: What types of snacks should I bring on a hike?
A: The best snacks to bring on a hike are ones that have both carbohydrates and proteins. Try packing whole wheat sandwiches, nuts and seeds, fruits, energy bars or trail mix.
Q: How often should I drink while hiking?
A: It’s important to stay hydrated while out in the wilderness – aim to drink water every 15 minutes while hiking. Take regular breaks during the day in order to refuel with food and fluids.
Q: What are some benefits of bringing good snacks on a hike?
A: Eating nutritious snacks while hiking can help maintain your energy levels, prevent fatigue and muscle cramps, and aid in recovery after exercise. It’s also a great way to stay motivated and focused!
Q: How should I store food while on a hike?
A: Pack snacks into sealable plastic bags or containers that can be securely closed. Hang the bags or containers from a tree branch at least 10 feet above ground, and keep food away from your sleeping area by at least 200 feet. When returning home, dispose of any remnants of food in trash receptacles only – never leave them along hiking trails!
Q: What are some easy-to-pack snacks that don’t require refrigeration or heating?
A: Some great snack options for a hike include sandwiches, nuts and seeds, fruits, energy bars or trail mix – all of which can be easily packed without the need for refrigeration or heating.
Q: Are there any special considerations when choosing snacks for a hike?
A: Yes – aim to choose snacks that are nutritionally balanced and easy to pack and store. Try to avoid sugary or processed snacks, as these can cause energy crashes. Also, if you’re planning on eating during the hike, make sure that you have plenty of water available in order to stay hydrated!
Q: When should I eat and drink during a hike?
A: Drink water every 15 minutes while hiking and take regular breaks during the day in order to refuel with food and fluids. Eating regularly helps your body recover quickly after exercise, so try to have snacks available throughout the day.
Q: What are some great snack options for hikers?
A: Some great snack options include: whole wheat sandwiches, nuts and seeds, fruits, energy bars and trail mix. Remember to drink plenty of water throughout the day in order to stay hydrated!
Q: What are the benefits of bringing good snacks on a hike?
A: Eating nutritious snacks while hiking can help maintain your energy levels, prevent fatigue and muscle cramps, and aid in recovery after exercise. It’s also a great way to stay motivated and focused while on the trail!
Q: What snacks should I avoid packing for a hike?
A: Try to avoid sugary or processed snacks, as these can cause energy crashes. Also, anything that requires refrigeration or heating is best left at home – aim to choose snacks that are easy-to-pack and store, such as sandwiches, nuts and seeds, fruits, energy bars or trail mix.
Q: How do I choose healthy snacks for a hike?
A: Aim to choose snacks that are nutritionally balanced and easy to pack and store. Try to avoid sugary or processed snacks, as these can cause energy crashes. Choose snacks that provide both carbohydrates and proteins, such as sandwiches, nuts and seeds, fruits, energy bars or trail mix – all of which are easy-to-pack and don’t require refrigeration or heating.
Q: What else should I consider when packing snacks for a hike?
A: Make sure that you have plenty of water available in order to stay hydrated. Also, store your food securely while on the trail by hanging it 10 feet above ground and keeping it away from your sleeping area. Finally, dispose of any remnants of food in trash receptacles only – never leave them along hiking trails!

Buying the right women’s motocross gear is not a cakewalk!
One of the most important aspects of getting the appropriate gear is knowing what to look for and what to shun when buying dirt bike gear.
It can be helpful to choose the correct equipment for you if you are new to motocross or other dirt-biking activities.
So how can you pick the greatest motocross equipment? You can choose the appropriate women’s motocross gear for your trip using the guidelines and recommendations in this post.
- Choose the Right Fit
Neither your clothing nor your accessories should ever be excessively tight or too loose. The equipment should be just snug enough to stay on your body and do its job of protecting you in the event of an accident. Look for adjustable items like pants with an adjustable waist so you can get a better fit.
You should sit down and pretend to be riding the bike as you try the gear on. This is important since it guarantees that the equipment is not uncomfortable or restricts your motions. When you sit down in a riding position, the gear may not appear to be too big on you even though it may first appear that way. You don’t want your clothing, such as your sleeves or your jeans, to ride up, exposing your flesh and raising your chance of getting hurt.
- Water Resistance
Your ride will be more convenient if your gear has water-resistance qualities. You can buy separate rain gear or purchase waterproof clothing.
Even with removable waterproof linings, external textiles continue to absorb water, and you will still get wet. They may also heat up, feel uncomfortable, and add weight.
- Don’t Overlook its Durability
Women’s motocross pants are often constructed from denier, nylon, or polyester fabric. Both nylon and polyester are incredibly comfortable to wear and dry extremely rapidly. This kind of fabric is durable and retains its quality even after multiple washing. High-denier material is designed to make your possible motocross pants more robust.
- Price
When selecting the appropriate equipment for you, the cost is yet another important factor. Most people don’t have an endless supply of money to spend on dirt bike equipment. Some items are worth a little bit more money than others, but you can get away with buying some items on a budget. When purchasing crucial items like helmets, for instance, you get what you pay for, therefore spending more on these items can result in safer products.
Consider how much you can afford to spend, then begin looking at the equipment that is within your spending limit. You can get things that suit your demands and budget range.
- Ventilation
Ventilation is a factor that is frequently disregarded when purchasing dirt bike equipment. It might be uncomfortable to ride in something that doesn’t have good ventilation and breathability. This is especially true if you ride during the sweltering summer. Air can flow freely through your gear and be wicked away from your body by materials with good ventilation and breathability. By doing so, you’ll be able to be more comfortable even when the outside temperature is higher.
Conclusion
Considering these factors will help you choose the right motocross gear for women that may not only offer maximum protection but perfectly cater to your needs and budget. Always remember to be safe!
——————————————-

When dealing with vehicles, proper maintenance goes a long way toward preventing unnecessary expenses and ensuring the vehicle’s longevity; an ATV is no different in this regard. However, knowing how to take care of your ATV is arguably more important for many reasons, including safety. ATV maintenance during “riding” season is relatively easy. Still, things usually take a different turn once the riding season is over.
Unfortunately, most people often forget to undertake proper ATV maintenance during winter, and as you would expect, they mostly end up paying dearly for it once it’s ATV season again, as their quads are usually significantly damaged.
Do you have an ATV? If you do and you’re looking for tips on how to carry out proper off-season ATV maintenance, read on to discover some of the best ways to ensure your ATV remains in perfect condition all season long.
Garages and ATV Covers
The first thing you’ll want to put on your ATV maintenance checklist is shelter and storage location. As you well know, your ATV is as much a vehicle as your car is. Basically, this means that just as your car requires shelter to protect it from weathering, especially during winter, your ATV also requires the same. You could even argue that providing shelter or cover for your ATV is even more important than doing the same for your car. You should also note that shielding your ATV from direct exposure to sunlight during summer is also important because the sun can also damage your ATV when you leave it exposed for too long.
If you have a garage, you should ensure to park your ATV inside it to effectively shield it from weathering damage. However, the fact remains that not everyone has access to a garage, and even if you did, your garage would only protect your ATV from “some” of the effects of weathering, not all. So, if you have an ATV, you should consider getting an ATV cover. ATV covers are designed to effectively shield your ATV from harsh environmental effects, ensuring they’ll remain in excellent condition regardless of the weather.
You may be thinking, “Why can’t I just use a random blanket or cloth from my home to cover my ATV?” The answer is simple; those clothes and blankets are not designed for ATV protection. If you use them, you’ll have water building up under them, eventually leading to mold and mildew growth, causing even more damage. With ATV covers, on the other hand, water under the cover will always evaporate quickly, so you can be sure your quad-wheeler will remain perfectly dry and mold-free. In addition, their unique design means you’ll be able to use ATV covers all year round, indoors and outdoors, to protect your ATV from the effects of weathering effectively.
Check Air Filter
Access to clean air is crucial for your ATV to function properly, and if your ATV’s air system is contaminated, it could lead to ATV engine issues. Therefore, you must ensure to check your ATV air filter system from time to time during your quad maintenance to ensure that no small animals or insects have made nests in your filter system. You’ll also want to ensure no dirt or debris clogs your air filter. To do this, simply locate the air filter cover (you should find it in the back of your ATV, under the bed). Once you’ve seen it, take off the cover and then look inside to be sure it’s clean.
Battery Maintenance
Another ATV maintenance task you’ll want to add to your ATV service checklist is battery evaluation and maintenance. Just like a regular car, ATV batteries become less effective or damaged over time when the ATV isn’t used, especially after exposure to cold or freezing weather. So you should ensure to start your ATV from time to time and just let the battery charge to ensure it doesn’t become dead before spring. In addition, you should know that there are different types of ATV batteries on the market, and some are more suited to cold temperatures than others. So you’ll also want to ensure you get the best cold weather ATV battery you can find if you plan on leaving the battery in the ATV all winter long. On the other hand, you could opt to remove the ATV’s battery and connect it to a trickle charger that will help ensure you don’t end up having a dead battery by spring; which is what will likely happen if you just remove the ATV’s battery and drop it somewhere in your home or garage.
Change Engine Oil
An engine oil change is a regular part of every automobile maintenance and should be part of your ATV maintenance checklist. You should always check your ATV’s engine oil state, especially if you haven’t used the ATV in a long while. This is because debris and dirt might have somehow gotten into your oil filter, and this will make the engine oil sticky and thick. Running your ATV with this oil content will likely result in engine damage, and fixing a damaged ATV engine will undoubtedly cost you a significant amount of money. So instead of dealing with lousy engine problems, simply make sure to swap out the bad oil for quality, fresh engine oil.
Tire Check
If you have a car, you’ll most likely notice that when you leave it parked for an extended period, the tires will tend to lose pressure and go flat. The same applies to an ATV, so proper tire care is essential to proper four-wheeler maintenance. You’ll want to check your tire pressure levels periodically during the off-season. If they’re lower than what they should be, you could opt to use a tire pump to get them back in the proper condition. Also, keep an eye out for damaged or worn-out ATV tires so you can replace them before riding the ATV again.
Other ATV maintenance tips you should add to your ATV maintenance checklist include the following:
- Check coolant and gas states to ensure they’re free from dirt and debris.
- Tighten ATV tire bolts before riding.
- Check engine belt condition.

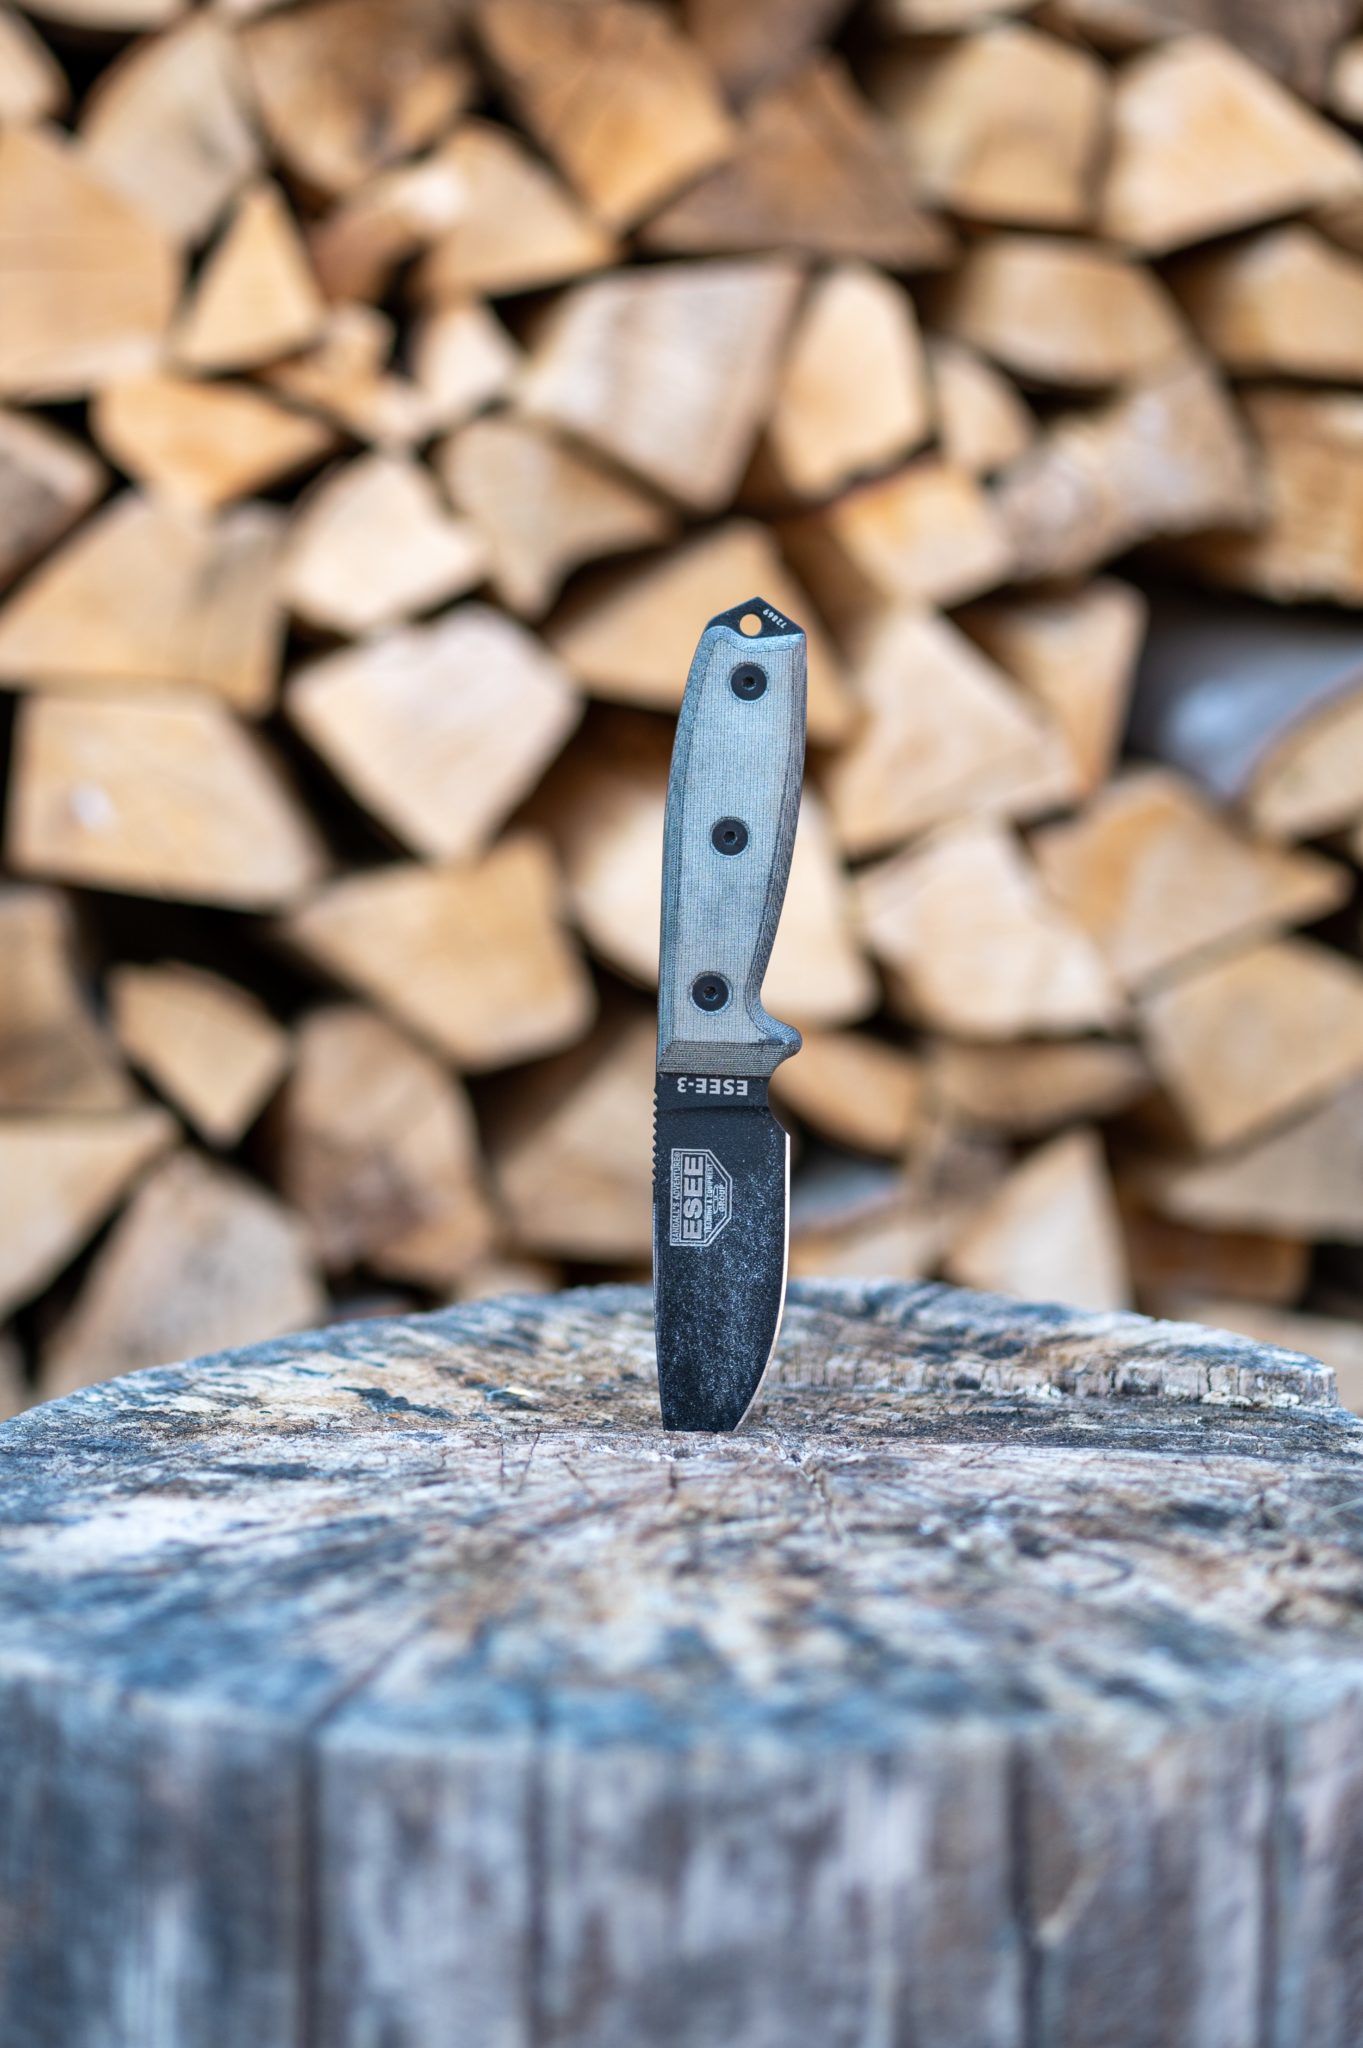
TOP-5 Custom Bushcraft Knives That Can Replace a Camp Hatchet

How to Take Your Own Internet to Outdoor Events

Outdoor Event WiFi: The New Backbone of Open-Air Experiences

Gear You Should Snag for the Great Outdoors This Season

Are You Ready for Autumn Adventures? How to Prep for an Unforgettable Outdoor Fall Guys Trip
BougeRV Showcases Sustainable Innovations at Outdoor Retailer Summer Market 2024

The Evolution of Outdoor Apparel: How Fashion Meets Functionality in the Wilderness

The Role of Camouflage in Wildlife Photography and Hunting
How The Annual REI Dividend Works
Spring Camping Must Haves: BougeRV’s CR Pro 30 and Portable Fridge Innovation

The Perfect Heated Clothing for Different Types of Cold Weather

13 Best Hot Springs in Utah

11 Best Hot Springs in Arizona

12 Best Hot Springs in California

12 Best Hot Springs in Virginia
-
 Outdoor Blog7 years ago
Camping Cots and Air Mattresses: What’s Best for You?
-
 Guns & Shooting Gear Reviews4 years ago
Best Gun Brands – Top 10 Gun Manufacturers in the World
-
 Best in Class Reviews4 years ago
The 7 Best Camping Dinnerware Items
-
 Outdoor Blog6 years ago
5 Useful Items To Have When You’re Out On Your Hunting Trip
-
 Best in Class Reviews6 years ago
The 7 Best Fixed-Blade Survival Knives – Tested & Reviewed
-
 Best in Class Reviews4 years ago
7 Great Sleeping Bags for Tall People – 2023 Review
-
 Backpacking Gear Reviews & Guides5 years ago
7 Best Solar Panel Trail Cameras – Reviewed
-
 Best in Class Reviews4 years ago
Top 7 Best Microspikes for Hiking – 2023 Review