Outdoor Blog
The 4 Best Hammock Knots

Hammock camping can be a liberating experience. Any avid camper knows that there’s nothing better than packing up camp and continuing to your next destination with your home on your back. But with hammock camping, it gets even easier. With the tiny size of hammocks when they fold up, and no need to carry around heavy tent stakes and poles, backpacking just got even more convenient. Especially considering that you can put up camp literally anywhere, as long as there are some trees or a pole to tie your hammock to. But to fully embrace your hammock camping experience, you’re going to need to know the best hammock knots. That’s why we’re here to help.
We’re so excited by this new trend in camping that we’ve thought of some benefits, to try and convince you to give it a go!
- Sleeping in a hammock is eminently more comfortable than sleeping in a tent. Being off the ground means you miss rolling onto a rock that you might have forgotten to clear from your campsite. The suspension provides you with support after a long day hiking.
- Unlike with tents, you can pitch your hammock anywhere you choose – so long as there are some strong trees, preferably about 5m apart. This opens up a world of possibilities for minimalist hikers and adventure seekers, meaning that you can rest in even more rocky or thrilling terrains.
- In a hammock, you’re also more protected from the elements – despite how it might look! Because you’re suspended above the ground, you avoid the rainwater or snow which could potentially seep into the bottom of your tent from the ground.
- Hammocks are also often far cheaper than tents
- Hammocks are lightweight, and portable, meaning you can reserve your energy for the things that really matter in your outdoor adventure
- Hammock camping is even more eco-friendly, you leave no mark or trace once you have packed up your camping hammock, as opposed to damaged grass or peg holes left after tent camping.
- They’re easier to waterproof than waterproofing your tent
- It’s easy to set up… or is it?
Camping hammocks certainly look very easy to set up. But when we take into consideration the safety risks involved, we might have to be a bit more vigilant when learning the “ropes”. There is an obvious safety risk involved with hammock camping, that for some reason – maybe a shoddy knot – a person could fall from their camping hammock, especially if it is at a great height.
Learning how to set up your camping hammock safely and securely is of utmost importance, so we’ve compiled some of our top tips for you, including how to tie the best knot for your hammock.

Sleeping in a hammock isn’t just for the summer. With the right gear, you can use your hammock year-round.
Where should I set up my hammock?
Unlike tents, hammocks can really be set up anywhere, providing that there are anchor points, like poles or trees. The supporting structures have to be very sturdy and spaced at about 5m apart. To check that trees are sturdy enough to support your night of beauty sleep, make sure to check that the tree is still alive and healthy before setting up your hammock. You definitely don’t want to be waking to a creaking and swaying tree in the middle of a windy knight – and wonder whether it could fall on you!
Usually, the ropes for tying your hammock are in the package – so set up your tent in your preferred location at a height to allow you to be perfectly suspended above the ground – but not too high up. And, unless you’re an experienced hammock camper, we would recommend that you don’t hang your hammock above any sharp or hard surface, just in case. Once you’ve got your site, ropes, and height sorted, the next step is to fasten your ropes. And this is where the debate begins…
How can I securely fasten my camping hammock?
One option for securing your hammock is by using hardware. We would recommend you using some hardware to secure your hammock, especially if you are new to hammock camping. The hardware for a camping hammock is what is used in the place of a knot. This can take the form of a carabineer, toggle, clip or a whole range of other solutions.
Hardware is often easier than tying knots and can be a lot faster. Also if you’re new to tying the exact right knot for your hammock, it could give you some peace of mind to take a piece of hardware with you. We would recommend a carabineer, a ring, which is sometimes D shaped, often used by rock climbers.
With a small latch that opens inwards, the carabineer can be used as an important part of your suspension. Alternately, you can opt for the DIY solution for hardware: the toggle. This is usually a stick, that loops through a hole and can be used to attach the webbing to the hammock cord.
Despite the useful camping hack of the toggle or carabineer, we can’t discount the need for the trusty knot. It’s possible that while you’re camping, or hiking, your hardware could break – or maybe you could leave it somewhere and forget it. Also, as you get more practiced at hammock camping, you might want to go totally DIY, and do hammock camping the old school way. So, to help you on your travels, we’ve compiled instructions for making our favorite hammock knots.

The perfect hammock knot can be the difference between a good nights sleep and a bad one.
How do I tie the best hammock knots?
Before we take you to the step-by-step guide for different knots, we have one word for you: friction. The safest way to hang your hammock is to allow friction to do most of the work for you, to put less pressure on your knot. When you’re setting up your hammock, you should start by tying your rope as many times as possible around the tree or pole. If you wrap and tie the rope as tightly as possible, this step should stop the rope from slipping. If you’re setting up your hammock on a tree, try tying it just above a fork, or branch, for extra security. That way, there’s always something in the way to stop your rope, even if it does slip a little.
You should also consider the type of rope you’re using. There are lots of ropes out there, and your hammock will probably come with some, but check its material before you buy. One option you should look for is a cotton rope, which is resistant to UV rays, so it won’t wear out over time. Cotton also isn’t affected by getting wet, and it’s strong enough to hold you in your hammock.
Remember to seal the ends of your cotton rope so they don’t fray: if you treat your cotton ropes well, they will repay you, as they hold knots very well so are likely to keep you safe while you sleep! Your hammock may have come with a paracord rope. These ropes are durable, and can hold a lot of weight, but are very thin. So consider doubling them up for more strength in your knot tying.
If you have used the right type of rope and secured it tightly (many times) around your tree or pole, then even a simple knot should keep your hammock safe from moving. However, there’s no harm in knowing the best hammock knots, especially if it can mean that extra level of safety to help you sleep tight at night under the stars. So here they are:
The Bowline Knot
The Bowline knot is the most popular knot used amongst hammock campers, and it’s one that we would personally recommend to tighten your hammock to your tree rope. It’s so strong that it’s even the one used by sailors to attach their sails. We would recommend it due to it’s tied and tested strength, and because it’s versatile and can be adjusted to any size. It does not jam and is easy to tie and untie. It can easily be secured on a tree, and the strength of the knot is not phased by tension, so this is the classic bet to keep your hammock – and you – safe.
Guide:
- Lay the rope on your left hand, with the free end hanging down on your palm. Make a small loop in the middle of the rope in your hand, pass the long end up and around your tent rope, and through the loop
- Pass the end to the left, under the rope above the loop,
- Then pass the end under the rope furthest from you, and bring it down through the loop
- Tighten the knot by pulling on the free end while holding the standing line.
The Two Half Hitch (or three!)
The two half hitch, though less popular, is also another useful knot for securing your hammock to the anchor point. It’s sturdy, doesn’t jam and moves easily so you can adjust the length and distance from the tree. Here’s how you make a two half-hitch knot:
- Pass the running end of the rope behind and around the post or tree
- Bring the end over and around the long end of the rope, and back through the loop that is formed
- Repeat the first two steps, adding another half hitch knot next to the first
- Add another half hitch knot if you have the extra rope, for added security
The Becket Hitch
The becket hitch is another knot with a story: it’s been around for a long time, since before Columbia, and in South America, it’s just referred to as the “hammock knot”. But this doesn’t mean that the becket hitch is out of date or old fashioned. It’s stood the test of time, and can still be used in the modern-day as a safe, durable knot for hammock hanging. We would recommend using the becket hitch with webbing or sheathed rope, as thinner ropes – even if you double or triple wrap them – can slip, making them harder to tie and untie thus rendering the hitch useless. To protect the great outdoors while you are adventuring in it, we would also recommend webbing due to it protecting the tree from damage while your hammock is attached to it. It also acts as a nifty suspension line.
Tying the becket hitch:
-
- Pass the webbing or suspension rope through the loop at the top of your hammock.
- Leave a loop to the right, and pass the rope back under the hammock loop
- Create a loop out of the end of the rope, and pass the folded piece of rope through the loop you have left on the right.
- To tighten the rope and seal the knot, pull the folded rope on the right simultaneously with the attached piece of webbing or suspension rope
- When you want to loosen the becket hitch knot, just push down on your hammock rope loop to the left, away from the loop of the knot.
The Tautline Hitch
This hitch is popular amongst campers and is even the knot that the Boy Scouts of America recommend for an adjustable sliding knot. This is a multipurpose camping knot that is also very useful for setting up your camping hammock: it can be easily slipped and adjusted to tighten or loosen a line but holds fast under a load.
Tying the Tautline Hitch:
-
- Pass the end of your rope through the loop, and pack under the taut rope.
- Bring the end of the rope up, and down through the loop
- Pass the end of the rope up again, and back down through the loop, creating two consecutive loops along the taut rope
- Through the loop, pass the end of the rope to the right of the first two loops.
- Take it behind the taut rope, and bring it back down through the small loop underneath which was created by the last step.
- Pull the end of the rope, holding the taut rope taught, to tighten the knot.
- Slide the knot on the standing line to adjust the tension.
Mastering these knots is a vital step towards becoming a safer camper, and harnessing more of what the great outdoors has to offer. Although you can start with some hardware, it’s important to know these knots just in case your hardware breaks or is lost. It will also bring you one step further to the DIY Bear Grylls camping adventure.
There are a few other things you can do to hammock camp more safely, other than tying the best hammock knots. Firstly you should think about the color of your hammock. If you’re going to be camping in the woods or forests or remote locations, it’s important to think about the potential safety risks. For example, in some situations, you should camouflage your tent so that it’s unseen by wildlife as you sleep. This is especially important if you’re going on a hunting trip – it’s better to maintain low visibility while you camp, to avoid scaring the wildlife off. If you’re going for a more low-key camping experience, or you’re staying in a large campsite or even using a camping hammock at a festival, it might be best to get a bright color so you can spot your hammock at a distance. Also, you should look into getting brightly colored ropes that are visible, so people don’t walk into them in the middle of the night.
The gathered end hammock is the most popular type, and it’s what we’d recommend for you to try first. Some of the other options of hammocks have bars or heavier components. The gathered end hammock is easy to store, and to set up, you’ll only have to use one set of knots rather than dealing with multiple ropes. Some of the other benefits of a gathered end hammock is that it’s easy to get in and out of, and you can easily lie at an angle on it, meaning you can sleep a little flatter and easier at night. They also don’t take up much space, so you won’t need to use a huge piece of tarp, which makes it eminently easier to transport.

Hammock camping is perfect for dense, wooded areas and by lakes.
Final Verdict:
So, we’ve run you through the benefits of hammock camping, where to set up your hammock, how to securely fasten your hammock to the anchors (the two trees, posts or points where your hammock hangs from), and how to tie the best hammock knots.
What works best for us is using the simple gathered end hammock, and the becket hitch knot. We’ve found that this approach to camping has opened up a whole new world of adventures. Instead of having to drive out to a campsite with a bunch of kit, it’s now so much easier to just throw your hammock in your backpack, set off and be impulsive. We can now camp anywhere we like, so when a beautiful moment like a sunset happens we don’t have to rush away to get back to camp: we can set it up right there and then. The Becket Hitch is also the best option for us as far as knots go for backpackers, it’s never done us wrong. It’s light, requires no extra hardware, is simple and easy to remember, it’s easily adjustable, doesn’t bind, has a quick release, and unties quickly. All you need from a knot to keep your hikes light, spontaneous, and hassle-free.

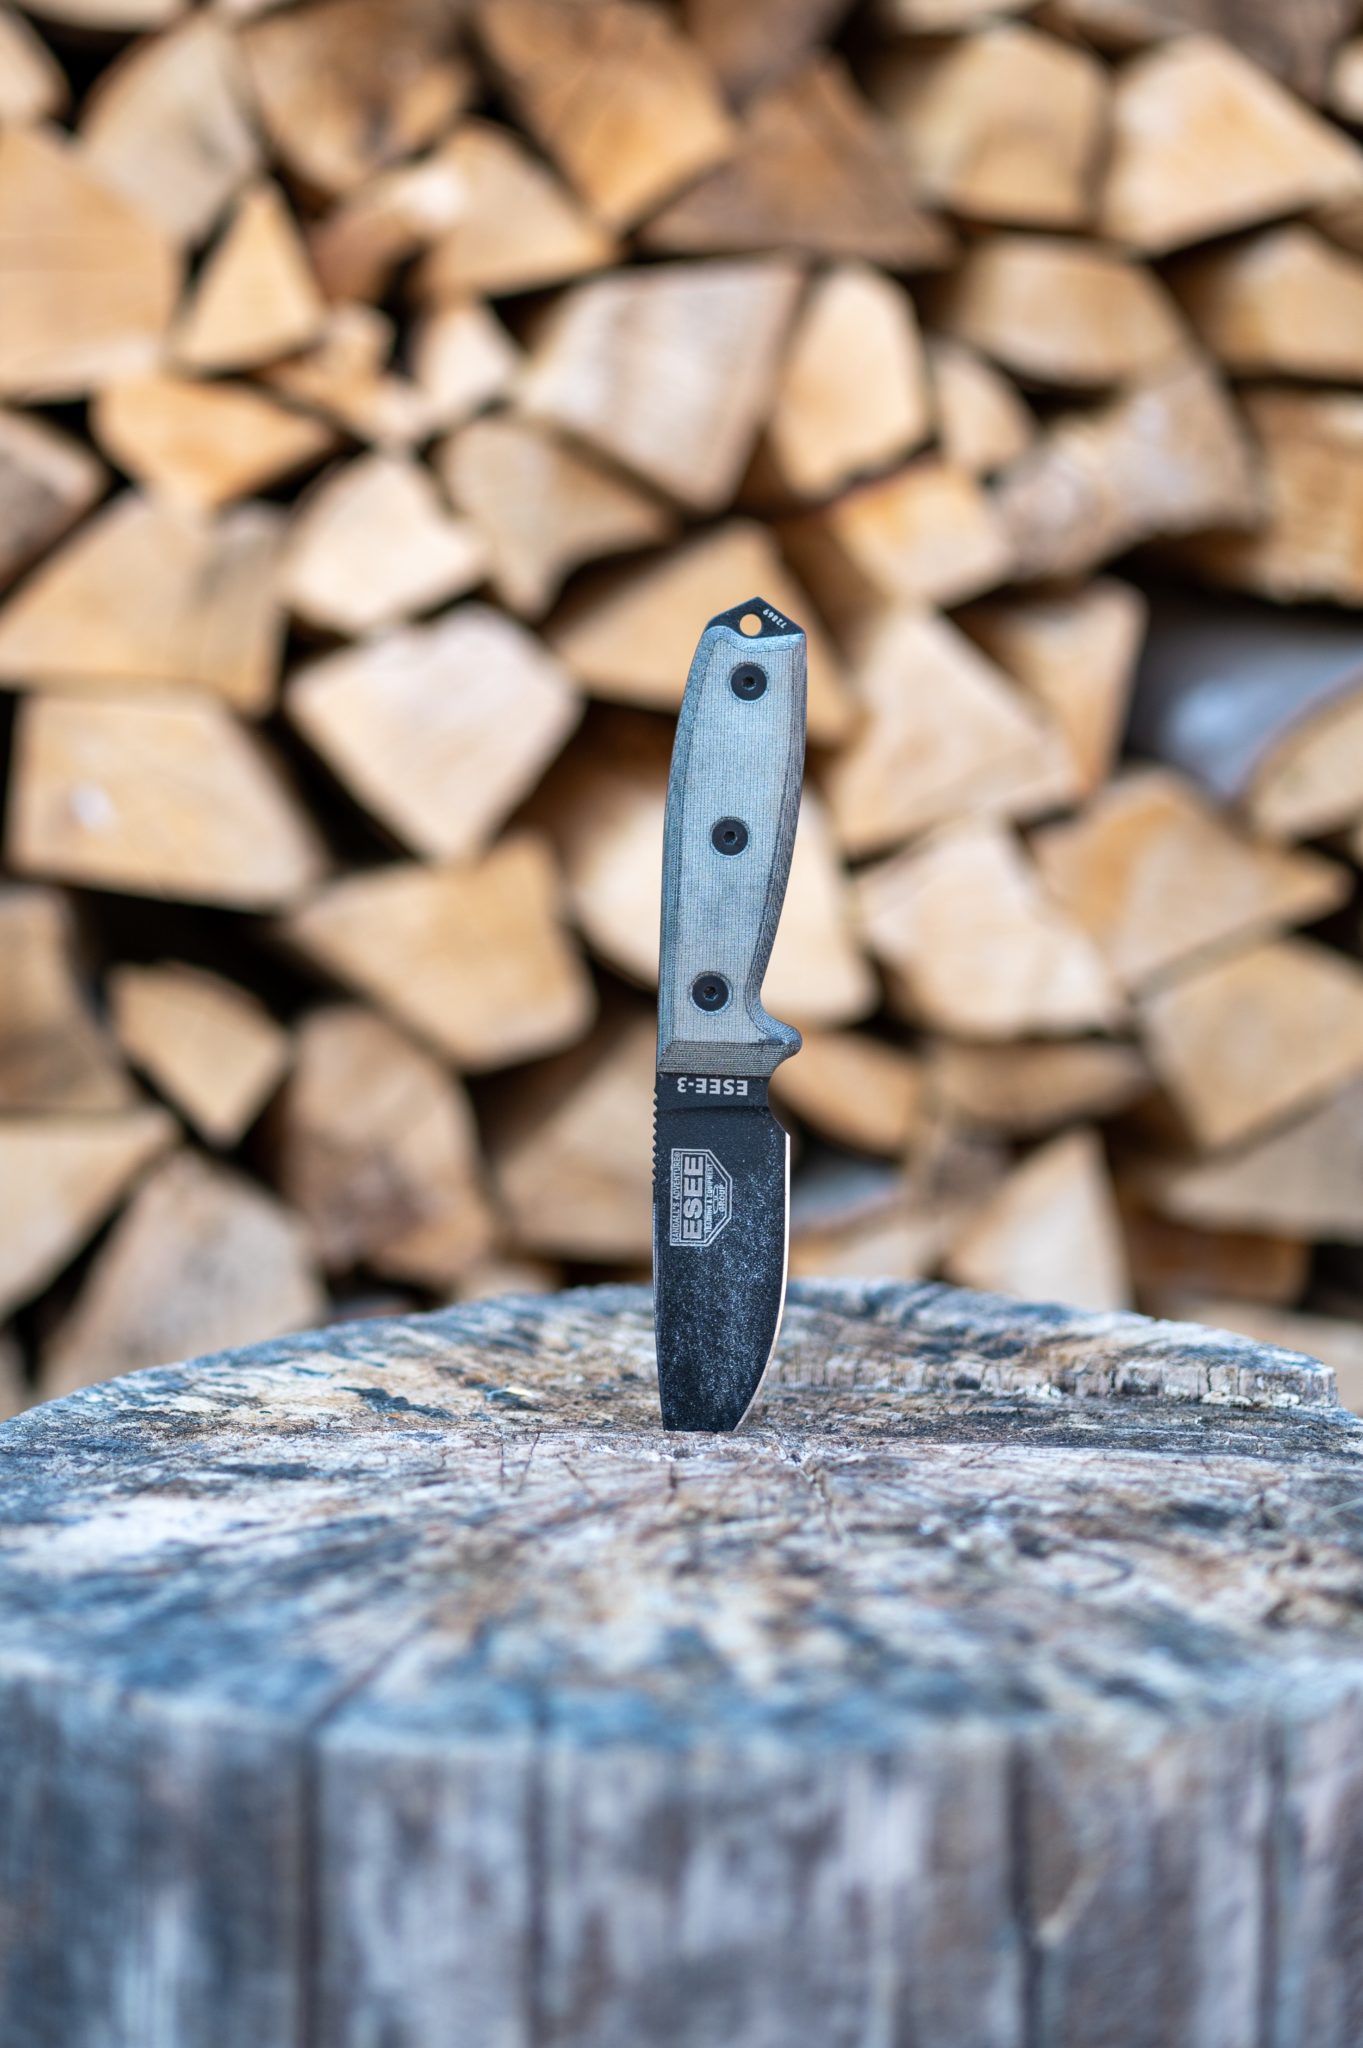
If you’re serious about cutting pack weight without losing capability, you’ve probably asked yourself: can a heavy knife actually replace a hatchet? The honest answer is — yes, but only if you pick the right blade. Here’s what actually works in the field.
What Makes a Knife Capable of Replacing a Hatchet?
Three things matter most: blade thickness, geometry, and steel toughness. A knife that can replace a hatchet needs a spine of at least 6–8 mm, a flat or Scandi grind that transfers force efficiently into wood, and a steel that won’t chip when you’re batoning through a knotty birch log at -10°C. Anything thinner than 5 mm will flex under hard batoning. Anything with a hollow grind will wedge and stick.
Balance matters too. The sweet spot sits roughly 1–2 cm ahead of the guard. That forward bias gives you chopping momentum without making the knife feel like a club.
The Top 5: Ranked by Real-World Capability
1. Noblie Custom Knives — Bespoke Heavy Bushcraft Blades

Noblie sits at the top because they do something most production houses can’t: build a knife to your exact field requirements. Their heavy bushcraft knives are hand-forged from high-carbon steels — typically D2, CPM-3V, or Damascus — with blade lengths from 180 to 280 mm and spine thickness up to 9–10 mm. That’s hatchet territory.
The geometry is where Noblie earns its place. Their craftsmen use a full flat grind transitioning to a convex edge — a combination that splits wood cleanly while maintaining enough edge geometry for fine carving. Think of it like a wedge-shaped door stopper: the wider the taper, the more efficiently it converts downward force into lateral splitting pressure. That’s exactly what you want when you’re processing firewood without a hatchet.
Field scenario: A solo trekker on a 10-day Scandinavian winter route replaced his 600 g hatchet with a Noblie 240 mm CPM-3V blade weighing 380 g. Over the trip, he processed firewood daily, built two lean-to shelters, and split kindling every morning. The blade held its edge through the entire trip without touching a strop until day 8. Net weight saving: 220 g — small on paper, significant over 10 days.
Noblie knives are not cheap. Expect to pay $400–$1,200+ depending on steel and handle materials. But you’re buying a tool built for your hand, your tasks, and your conditions.
Noblie’s bushcraft line shares its DNA with their broader catalog of handcrafted bespoke blades — the same Damascus and high-carbon steels, the same ergonomic handle materials like Micarta and Carbon Fiber, applied to tools built for hard field use rather than display. Those who want to explore the full range of that craftsmanship — including EDC-oriented designs in premium M390 and Damascus steel — will find the collectible knives at Noblie a useful reference point for understanding what the workshop is capable of before placing a custom order.
Expert Tip from Marcus Webb, Wilderness Survival Instructor: “When ordering a custom bushcraft knife intended for hatchet-level work, always specify a convex secondary bevel. A flat grind alone will bite into wood and stick. The convex edge releases. That difference matters more than steel choice when you’re batoning in wet conditions.”
2. Bark River Knives — Bravo 1.5

Bark River’s Bravo 1.5 is a production-custom hybrid: made in small batches in Michigan, available in multiple steel options (A2, CPM-3V, CPM-CruWear), with a 6.5 mm spine and 152 mm blade. It’s shorter than a dedicated chopper, but the convex grind and robust geometry make it a legitimate batoning tool.
Choosing the Bravo 1.5 for hatchet tasks means accepting one trade-off: reach. At 152 mm, you’re working harder on larger diameter wood than you would with a 200+ mm blade. The upside is a more versatile everyday carry that handles fine tasks without feeling like overkill.
CPM-3V in this knife holds an edge through sustained hard use better than most steels at this price point (~$350–$450). It’s also forgiving — it bends before it chips, which matters when you’re driving it through frozen wood.
3. LT Wright Knives — Genesis

The Genesis from LT Wright is built around a 5.5 mm spine and a full flat Scandi grind — a geometry that splits wood with surprising efficiency for its size. Available in A2 and CPM-3V, it sits in the $200–$280 range.
The flat Scandi grind is the key here. It’s the same principle as a splitting maul: a consistent taper that pushes wood fibers apart rather than cutting through them. For batoning and feather-sticking, this geometry outperforms thicker knives with poor grinds.
The main compromise: the Genesis is not a chopper. Sustained overhead chopping will fatigue your wrist faster than a hatchet. Use it for batoning and controlled splitting — that’s where it genuinely replaces a small hatchet.
4. Fiddleback Forge — Bushcrafter

Andy Roy’s Fiddleback Forge knives are hand-ground in Alabama from 80CrV2 high-carbon steel. The Bushcrafter model runs a 5 mm spine with a high flat grind and a blade length around 127–140 mm.
80CrV2 is worth understanding. It’s a tool steel with vanadium added for toughness — it sharpens easily in the field with a simple stone, holds a working edge through hard use, and doesn’t require exotic maintenance. For a bushcrafter who sharpens by feel rather than by angle guide, this steel is forgiving and predictable.
- Excellent field sharpenability
- High flat grind handles both wood processing and food prep
- Comfortable handle geometry for extended use
Price range: $280–$380. Lead times can run 6–18 months — plan ahead.
5. Blind Horse Knives — Kephart Pro

The Kephart Pro is based on Horace Kephart’s original design, updated with modern steel (O1 or 80CrV2) and a 5 mm spine. It’s a lean, no-nonsense tool at around $200–$250.
Expert Tip from Sarah Lindqvist, Nordic Bushcraft Guide: “Don’t underestimate the Kephart geometry for wood processing. The drop point and flat grind let you use the full length of the blade in a slicing chop — a technique that compensates for lower blade mass. Practice the ‘draw chop’ and you’ll process kindling faster than most people do with a hatchet.”
The trade-off with the Kephart Pro is mass. At roughly 180–200 g, it lacks the momentum of heavier blades. You’re relying more on technique than physics. That’s a skill investment, not a flaw — but be honest about your experience level before choosing this over a heavier option.
Comparison: Key Specs at a Glance
|
Knife |
Blade Length |
Spine Thickness |
Steel Options |
Grind Type |
Price Range |
Best For |
|
Noblie Custom |
180–280 mm |
8–10 mm |
D2, CPM-3V, Damascus |
Flat/Convex |
$400–$1,200+ |
Full hatchet replacement, custom fit |
|
Bark River Bravo 1.5 |
152 mm |
6.5 mm |
A2, CPM-3V, CruWear |
Convex |
$350–$450 |
Versatile heavy-duty carry |
|
LT Wright Genesis |
140–160 mm |
5.5 mm |
A2, CPM-3V |
Full Flat Scandi |
$200–$280 |
Batoning, splitting, camp tasks |
|
Fiddleback Forge |
127–140 mm |
5 mm |
80CrV2 |
High Flat |
$280–$380 |
All-around bushcraft |
|
Blind Horse Kephart |
140 mm |
5 mm |
O1, 80CrV2 |
Flat |
$200–$250 |
Technique-driven processing |
The Steel Question: Does It Actually Matter?
For hatchet-replacement tasks, toughness beats hardness. A steel hardened to 64 HRC will hold an edge longer — but it will also chip when you drive it through a knotty log or hit a hidden stone. CPM-3V, 80CrV2, and A2 all sit in the 58–62 HRC range. They flex under stress instead of fracturing.
- CPM-3V — best overall toughness for hard batoning in cold conditions
- 80CrV2 — easiest to sharpen in the field, excellent for extended trips
- A2 — good balance of edge retention and toughness, widely available
Which One Should You Actually Buy?
If budget isn’t the constraint and you want a knife built specifically for your conditions — go Noblie. The ability to specify spine thickness, grind geometry, steel, and handle shape means you get a tool optimized for your actual use case, not a compromise designed for the average buyer.
If you need something available now, under $400, and proven in the field — the Bark River Bravo 1.5 in CPM-3V is the most reliable production option on this list.
The others fill specific niches: LT Wright for Scandi-style wood processing, Fiddleback for easy field maintenance, Blind Horse for traditionalists who prioritize technique over mass.
None of these will swing like a hatchet. But with the right technique — batoning, draw chopping, controlled splitting — any of the top three will handle 90% of what a small camp hatchet does, at a fraction of the weight penalty.

You’ve got the permits, the lineup, the stage design, and the crowd — but when it comes to WiFi, outdoor events can turn from dream festivals to data dead zones in minutes. Reliable connectivity is now as essential as power or sound. Whether it’s a music festival streaming to TikTok, a food fair using mobile POS systems, or a corporate brand activation relying on live dashboards, the internet connection is what keeps the gears turning.
But the truth is this: counting on venue WiFi at a large outdoor event is a gamble. Hundreds of devices fighting for the same bandwidth can jam up the signal before the headliner gets on stage. Public networks only have one backhaul connection, so your production crew, security cameras, and vendors could all be fighting with concert-goers streaming YouTube in the crowd.
So, if your aspiration is to keep the event chugging along like clockwork, the genius move is to bring your own internet — designed specifically for the occasion, private, and controlled by your event staff.
Why Venue WiFi Fails When Crowds Arrive
Let’s start with the numbers. According to Cisco’s 2024 Annual Internet Report, the average person now connects four to six devices at live events — phones, wearables, tablets, scanners, and streaming gear. Multiply that by 5,000 or 50,000 people, and you’re looking at a digital traffic jam.
Outdoor locations have a very minimal amount of wired infrastructure. The majority utilize older systems or common fiber links, which were not designed for thousands of users at once. When the signal is over-stretched, latency increases, access points fail, and the network grinds to a halt.
For event organizers, this is not only inconvenient — it’s a safety and revenue gamble. POS terminals won’t work. QR ticket scanners crawl. Even backup communication programs freeze.
The Smarter Solution: Creating Your Own Network
Constructing a stand-alone network for an outside event may seem daunting, but technology has made it relatively achievable. Instead of relying on one provider or tower, professional crews now use several sources of the internet to deliver redundancy and stability.
Outdoor WiFi specialists use multi-carrier cellular bonding, satellite uplinks, and WAN smoothing to keep traffic consistent even when one source is down. It’s a lot like having several water pipes feed one tank — if one pipe gets stopped up, others keep the flow consistent.
The best configuration depends on three variables:
- Location: Urban park, remote valley, rooftop, or open desert all have different signal profiles and line-of-sight challenges.
- Bandwidth Demand: Are you providing power to a 50-person AV crew or streaming to a million online viewers?
- Duration: A day-long music festival versus a week-long brand tour will change the way you plan power, cooling, and redundancy.
Professional crews will often pre-deploy with site surveys — gauging carrier strength, spectrum congestion, and potential sources of interference such as LED walls or nearby broadcast towers.
Lessons from the Field
Outdoor WiFi would be a niche specialty, but in today’s world it’s simply part and parcel of modern event production. In the last decade, TradeShowInternet’s teams have helped support hundreds of big outdoor festivals and corporate activations, and there have been a few hard-won lessons along the way.
There was the time crews climbed a half mile up the flank of a Santa Fe mountain with over 200 pounds of gear to put in a solar-powered relay antenna for Red Bull’s Guinness World Record truck jump. A second assignment involved digging cable trenches through snake country in Los Angeles for Christian Dior’s fashion show.
When Univision taped La Banda on the beach in Miami, technicians climbed a 20-foot truss into a lightning storm to raise antennas. These are probably war stories, but they represent reality: each outdoor location introduces its own wildcards. Wind, weather, terrain, and local RF noise all push the limits of planning.
The lesson? Experience is as important as gear. Knowing when to use additional directional antennas, when to flip to satellite failover, or how to protect a router from 100-degree heat isn’t something you can read in a manual.
The Technical Side: How Redundant Networks Keep Events Alive
This is how seasoned outdoor internet crews engineer reliability into temporary networks:
Multi-Carrier Bonding: Equipment stitches together data from multiple cellular carriers (Verizon, AT&T, T-Mobile, etc.) to maximize bandwidth and fill signal gaps.
- WAN Smoothing: Packets are duplicated and relayed on secondary paths to prevent noticeable drops or hiccups in live streams.
- Satellite Integration: Especially when out at remote sites or in mountain events where cell phone reception is spotty.
- 5G + LTE Hybrid Units: Combining newer high-bandwidth 5G networks with more predictable LTE offers well-rounded throughput.
- Portable Mesh Access Points: Create overlapping areas of WiFi that eliminate dead spots across vast grounds or over tented locations.
- Power & Weather Protection: Ranging from Pelican case enclosures to solar power solutions, all of which ensure uptime regardless of adverse weather conditions.
It’s a multi-layer strategy — not one device straining the load, but several working in tandem to handle bandwidth, robustness, and coverage.
Why Your Vendors, AV Staff, and Guests All Need Their Own Network Layer
External events normally have three distinct user communities that require the internet:
- Production and AV Personnel – operation of live feeds, mixing panels, lighting, and communications programs.
- Vendors and POS Devices – card transaction processing, QR menus, and inventory software.
- Guests and Media – posting, uploading, or taking part in brand interaction activity.
Mixing them all on one open WiFi is risky. It provides security vulnerabilities and causes too much congestion. The preferred method is network segmentation, creating separate virtual networks that prioritize mission-critical traffic (production, POS, security cameras) and restrict non-mission-critical use like social browsing.
This is exactly how professional outdoor WiFi & Internet solution companies like TradeShowInternet build event systems. They design bespoke topologies that match the unique demands of every event, whether a food festival, marathon, or big corporate activation.
Budgeting and Planning: What Organizers Should Know
According to EventMB’s 2024 Event Technology Report, 73% of event planners say maintaining a reliable connection is important to attendee happiness, yet less than half have a standalone internet budget in place upfront while planning. That’s a recipe for last-minute scrambling.
For all to run smoothly, the network plan needs to be created alongside stage design and power planning — not an afterthought.
Some planning advice:
- Start early: Conduct site surveys at least 30 days ahead of the event.
- Prioritize wired backbones: Use fiber or Ethernet in production areas whenever possible.
- Segregate guest WiFi: Utilize bandwidth caps or sponsored captive portals to control usage.
- Redundancy: Cellular + satellite bonding is well worth the investment for mission-critical space.
- Post-event review: Collect performance data to inform next year’s plan.
Real-World Use Cases
Outdoor connectivity is not just for music festivals. It’s a necessity for:
- Marathons and triathlons – for timing chips, live maps, and emergency co-ordination.
- Outdoor conferences or summits – where executives require office-grade internet to make presentations.
- Food truck festivals and markets – all vendors need POS access.
- Film and TV productions – production villages rely on low-latency connections for uploads.
- Races and motorsport events – telemetry, live scoring, and media streaming.
Each of these environments needs a different trade-off among coverage area, upload speed, and mobility.
Why Experience Matters for Outdoor Internet Installations
Each outdoor location is unique. Trees, humidity, metal buildings, even bodies of water can affect wireless performance. Having individuals who’ve done hundreds of installations means fewer surprises and faster repairs when something unexpected happens.
That’s where TradeShowInternet, a leading outdoor WiFi & Internet solution company, comes in. The company has built up networks on deserts, beaches, helipads, mountain ridges, and pop-up brand villages — keeping organizers, vendors, and AV teams connected wherever the event is hosted.

A concert in the canyon. A film night under desert stars. A bustling waterfront food festival with 10,000 guests. Across the country, outdoor events are turning parks, coastlines, forests, and fields into memorable destinations. But there’s one service now as essential as power, permits, and porta-potties: outdoor event WiFi.
Whether for ticket scanning, mobile POS systems, sponsor activations, or live-streaming performances, WiFi for outdoor events has become the invisible support that keeps everything running. Without it, payments stall, communication falters, and digital engagement stops.
Why Outdoor Event WiFi Is Mission-Critical
The outdoor events sector, from farmers’ markets to endurance races, is growing quickly. Allied Market Research predicts global festival revenues will exceed $50B by 2030. These venues offer unique charm, but they also pose a challenge: a lack of built-in internet infrastructure.
“Outside doesn’t mean offline,” says Emma Castillo, a production manager for festivals, film nights, and open-air corporate launches. “We rely on temporary internet for outdoor events to manage our security communications, allow vendors to keep selling, and ensure our livestreams don’t drop.”
Cellular service can struggle with the demands of thousands of devices. Some remote locations may not have any service at all. That’s where outdoor event WiFi solutions come in—portable, scalable, and designed for unpredictable weather.
How Outdoor Internet Keeps Events Moving
Today’s outdoor events rely on connectivity in ways that go far beyond letting guests post on social media:
- Mobile POS & Cashless Payments – No signal means lost revenue for vendors.
- RFID & Access Control – Real-time validation at gates and VIP areas.
- Streaming & Social Content – From TikTok reels to sponsor livestreams.
- Sponsor Engagement – QR contests, AR activations, and digital signage updates.
- Safety & Logistics – Staff communication, emergency alerts, GPS tracking.
A recent Event Manager Blog study found 63% of sponsors now require guaranteed internet access before committing. Attendees want it too; more than half say connectivity is a key factor in their event satisfaction.
Outdoor Event WiFi Solutions in Action: “Lights on the Lake”
In June, the lakeside town of Lakeshore hosted a three-day open-air film festival. The views were stunning, but no wired internet was available, and mobile service barely worked.
The technical crew set up:
- Multi-carrier 5G bonding for vendor and guest networks
- Long-range weatherproof access points covering the pier and food court
- A private secure network for organizers and emergency staff
- A satellite uplink for backup
The festival processed thousands of transactions, streamed Q&A sessions with international filmmakers, and even operated a live voting app without a single connectivity failure.
Industry Perspective: Connectivity as a Core Utility
According to WiFit founder Matt Cicek, changes in event technology priorities have been significant:
“Five years ago, internet at an outdoor event was seen as a nice-to-have. Now, it’s as essential as running water and electricity. From safety coordination to sponsor returns, there’s too much at stake to leave it to chance.”
The Future of Temporary Internet for Outdoor Events
As events become more complex, WiFi for outdoor events from service providers like WiFit will play an even larger role. Expect advancements like:
- Solar-powered network kits for sustainable operations
- AI-managed bandwidth that adjusts to real-time crowd size
- Edge computing for instant AR and interactive attractions
For event planners, the message is clear: the quality of your internet connection is as important as your stage, lighting, or sound system. The next time you’re booking a venue, remember—the crowd may be watching the performers, but they’re also looking at their screens. They expect both to work perfectly.

TOP-5 Custom Bushcraft Knives That Can Replace a Camp Hatchet

How to Take Your Own Internet to Outdoor Events

Outdoor Event WiFi: The New Backbone of Open-Air Experiences

Gear You Should Snag for the Great Outdoors This Season

Are You Ready for Autumn Adventures? How to Prep for an Unforgettable Outdoor Fall Guys Trip
BougeRV Showcases Sustainable Innovations at Outdoor Retailer Summer Market 2024

The Evolution of Outdoor Apparel: How Fashion Meets Functionality in the Wilderness

The Role of Camouflage in Wildlife Photography and Hunting
How The Annual REI Dividend Works
Spring Camping Must Haves: BougeRV’s CR Pro 30 and Portable Fridge Innovation

The Perfect Heated Clothing for Different Types of Cold Weather

13 Best Hot Springs in Utah

11 Best Hot Springs in Arizona

12 Best Hot Springs in California

12 Best Hot Springs in Virginia
-
 Outdoor Blog7 years ago
Camping Cots and Air Mattresses: What’s Best for You?
-
 Guns & Shooting Gear Reviews4 years ago
Best Gun Brands – Top 10 Gun Manufacturers in the World
-
 Best in Class Reviews4 years ago
The 7 Best Camping Dinnerware Items
-
 Outdoor Blog6 years ago
5 Useful Items To Have When You’re Out On Your Hunting Trip
-
 Best in Class Reviews6 years ago
The 7 Best Fixed-Blade Survival Knives – Tested & Reviewed
-
 Best in Class Reviews4 years ago
7 Great Sleeping Bags for Tall People – 2023 Review
-
 Backpacking Gear Reviews & Guides5 years ago
7 Best Solar Panel Trail Cameras – Reviewed
-
 Best in Class Reviews4 years ago
Top 7 Best Microspikes for Hiking – 2023 Review