Backpacking Gear Reviews & Guides
How to Test Spring Water

Clean drinking water is essential out on the trail. Since hikers need so much water to stay hydrated while they’re hiking in the backcountry and standard plastic water bottles are cumbersome and don’t adhere to the Leave No Trace principles, it’s better and more convenient to pack a reusable water bottle that hikers can refill while they hike.
Of course, depending on water fountains and faucets is bound to leave hikers thirsty if they are trekking deep in the backcountry. For true versatility, hikers should train themselves to identify potable water sources. To be really safe, they should also know how to test a water source for things that won’t be visible to the naked eye but can cause lots of harm if ingested in large enough quantities.
Some spring water will have a high enough flow rate that minerals from the rocks it passes through don’t fall out of suspension. If the water remains underground for a long enough time, plant species and algae that have grown in it will likely perish. However, manmade pollutants and bacteria won’t die from lack of sunlight, so testing spring water is really important to avoid illness.
Water containing Escherichia Coli, or E. coli, can cause a wide range of symptoms in humans who consume it. Nausea, stomach cramps, diarrhea, fever, and vomiting can all be caused by certain strains of E. coli. The presence of E. coli also indicates a strong likelihood of other harmful bacteria such as cryptosporidium, norovirus, shigella, and giardia, each of which is very dangerous for human consumption. E. coli is a coliform that is already present in humans, but certain strains of it can be harmful and possibly even fatal, which is why treating spring water on the hiking trail is so important.

Treating drinking water from a water source is critically important on the hiking trail.
Natural springs are easy to understand but it does require some research to understand how they work in order to understand what can be wrong with them. Some springs have a yellow or tannish color or brackish appearance due to their immediate surroundings, while others flow completely clear and taste so fresh that it seems impossible any coliforms could be present. This common misconception frequently leads to illness for hikers who put too much trust into seemingly clean water sources. Bacteria testing and other measurements for things like alkalinity and pH, or ionization, are quick solutions and bringing along the right water filter or another treatment system can save lots of strife from waterborne illnesses.
Read on through this comprehensive guide to freshwater springs and how to test them and treat them to quench your thirst on the next backcountry hiking trip.
What to test for in spring water
If you want to test a possible water source, there are tons and tons of different levels and contents you can scan for. Municipal water is often put through dozens of kinds of bacteria testing and water treatment up to 100 times a month per regulations. Bottled water companies don’t have to test as much or as often and about 1 in 4 companies are simply repackaging municipal water. Many people who are able to do so have dug a private well near their house to avoid having to rely on large corporations or the public water supply for their drinking water. Having access to spring water right that regularly is doubtless great, but obviously not a feasible solution for everybody.
There are consumer-grade water treatment options and water testing kits that are available on Amazon and likely in a hardware store in your area. Whether you’re out on the trail or testing a private well, a water analysis should focus on a few certain things to ensure the drinking water produced is healthy and free of volatile organic compounds and coliform bacteria. Here are a few things to test for in your drinking water source:
- Alkalinity: This is a property of water that determines its ability to neutralize acidic compounds. If drinking water has enough chemicals such as carbonates, bicarbonates, and hydroxides, then it will have enough alkalinity and will not taste acidic. This is good news for organisms that live in larger bodies of water like lakes since their water environment won’t change suddenly due to the introduction of acidic rain or runoff. It’s also good news for hikers who are stopping to refill their drinking water; low alkalinity in spring water means it can be corrosive and harmful to drink.
- pH or ionization: These two terms sometimes cause some confusion due to the expansion of the meaning of ionization in recent years. Anyone who went through a science class or has ever had to take care of a pool likely knows the term ‘pH’ even if the meaning has been forgotten. Essentially, pH is a measure of the activity of the hydrogen ion and indicates whether the water is ‘hard’ or ‘soft,’ which in turn lets hikers know whether its susceptible to absorbing metallic ions from the rocks it passes. Common elements leached into spring water that has a low pH are iron, manganese, copper, lead, and zinc. Other elements that come from manmade sources are more harmful.
- Total dissolved solids, or TDS: As the name implies, this is a measurement of the number of compounds and other materials that are dissolved in spring water. These are generally inorganic chemicals such as calcium, magnesium, potassium, sodium, bicarbonates, chlorides, and sulfates. Drinking water with a high TDS is an indication that the pH is off or that the water source has low alkalinity and has likely absorbed harmful compounds from its surroundings. This is generally the first test that should be performed on a water source since its main purpose is an indicator for the other two important areas already mentioned.
- Total coliform bacteria: This is the most important test that should be performed on every water source. As discussed earlier, coliform bacteria is already found in humans. It’s specifically located in the intestinal tract, as it is with many other warm-blooded mammals. What this means is that water containing high concentrations of coliform bacteria has come into contact with the product of those intestinal tracts, i.e. fecal matter. It can also be found in soil and in some insects, all of which are common in natural water sources like rivers, streams, and springs. This kind of bacteria is what leads to waterborne illness and can seriously affect long term health. Hikers afflicted by a waterborne disease might face a sudden end to their hiking adventure.

Brackish or unclear spring water should be tested and heavily treated before consumption.
Nitrates in drinking water
Both private water sources and spring water should be tested for nitrates that can lead to serious health problems. One of the worst effects of high nitrate consumption is methemoglobinemia, or ‘blue baby syndrome,’ a disease in which nitrite bonds to the oxygen molecules in an infant’s red blood cells, leading to depleted oxygen levels and potentially leading to suffocation.
The risk decreases outside of infancy, but hikers planning to trek through backcountry that’s near agricultural centers should take special care to test and treat their drinking water to make sure it isn’t contaminated with nitrates.
Nitrates occur naturally but not at levels that would cause harm to pregnant or nursing women or infants. Inorganic chemicals in industrial fertilizers and animal manures used in agricultural watersheds and not taken up by crops can leach into spring water via underground pathways.
Lawn fertilizers and on-site septic systems like those found near many campgrounds can also cause high nitrate levels, so test spring water even if it’s found near civilization.
Heavy metals in drinking water
Similarly to nitrates, heavy metals and arsenic compounds are one of the leading causes of illness in humans who rely on water sources contaminated with them. All sorts of water sources are regularly studied and measured to ensure that they are not absorbing heavy metals from poor water treatment, pipeline corrosion, or other shortfalls.
The same attitude should be taken by hikers who want to take a drink of spring water. Environmental factors and lead to the leaching of heavy metals into drinking water in areas where any kind of human industrial activity has occurred. This doesn’t necessarily have to be large factories or production centers, but can also come from municipal water pipes and similar relatively smaller human industrial equipment.
Repeated consumption of even low doses of arsenic and heavy metals in drinking water has been found to lead to respiratory problems in both children and adults as well as in cardiovascular disease, diabetes, and cancers of the skin, bladder, and lung. Anyone who hikes regularly should make sure to pack a water testing kit and a highly effective treatment system if they plan to rely on spring water to stay hydrated, especially nearer to urban areas where heavy metals are more likely to be present.
How to test the quality of spring water
There are two methods of water testing that can work for well water, spring water, and bottled water alike. One of them consists of visual tests and a few other sensory estimations and should only be used in the most dire of situations when drinking water is in great need and scarce. The other involved the use of a water testing kit and can reveal much more information about a water source.
Hikers at a campsite or planning to be near a given water source for longer periods of time should definitely test a water source before imbibing. Of course, if the water isn’t silty or brackish and looks clear enough to drink, hikers are known to simply pass it through an effective filter than treats against coliform bacteria and heavy metals. You can also boil water, but remember that softer water with low alkalinity can taste acidic even after it’s heated up. Many a hiker has had a morning cup of coffee ruined by strange-tasting spring water!
Water testing kits come in a few different types. One of the most famous, the WaterSafe Well Water Test Kit, is manufactured in test strips that are submerged in a sample of the target drinking water and change color to indicate the alkalinity, pH, or presence of unwanted minerals and inorganic chemicals in the water source. SafeWater also manufactures other tests that specifically target bacteria, pesticides, and lead.
Bear in mind that this type of water testing kit is only for testing; the strips themselves won’t do anything but indicate the presence of bacteria, pesticides, and lead. They aren’t meant to treat anything. For that, you’ll want a water treatment system.
Steps to test water quality in the backcountry
Gather a small sample of the spring water in a cup or other piece of equipment dedicated to this purpose. Many water testing kits come with vials, but any small receptacle will work. Try not to use your reusable water bottle, since the whole point of water testing is not to contaminate it with harmful water.
Dip a test strip into the water and let it rest there for a minute or two. There should be a key or color-coded results list included with the water treatment kit. Wait to see what the results are and try to match the shade of the test strip as well as you can with the key given in the kit.
That’s all! It’s a very simple process that can save lots of pain and misery by avoiding digestive sickness and even more serious illnesses over time.

Even the most pristine-looking spring water should be tested for harmful bacteria.
How to treat spring water
Once you have the results of the water testing kit, you’ll need to have some kind of water treatment handy. There are a few kinds of water filters specifically built for hikers, campers, and other outdoor enthusiasts. Trail runners will prefer models that operate by hand pump and can quickly be dipped into a trailside river or spring to refill a water bottle and keep moving in a matter of minutes.
Hikers who tend to take multi-day excursions and prefer to treat drinking water in large quantities rather than trek back and forth between a campsite and a water source should try a more heavy-duty water purification system that works with gravity. Large models can treat several gallons at one time.
Boiling water might get rid of most of the harmful bacteria, but it won’t get rid of inorganic material that gives the drinking water a brackish appearance. Filtration systems are usually seamlessly integrated into water treatment tools most often favored by hikers, campers, and backpackers.
Most operate by simply placing the filter or filtration system into the water source and either pumping a hand pump to direct water into a water bottle or filling up a reservoir and then hanging it from a tree limb to let gravity direct it through a filter that can remove debris and harmful bacteria at the same time. Cleaning them is usually just a matter of pushing water backward through the filter to remove debris and washing with soap and water after coming in off the hiking trail.
Final Verdict:
Testing spring water out in the backcountry is a really easy process and it can be helpful not only to avoid some pretty nasty illnesses but also to keep track of what kind of elements are finding their way into your body for any other purposes.
If you have a private well that you drink from regularly, you can keep up a regular testing schedule and be able to prove that nearby industrial activity has led to harmful leaching into your water supply, for example. Hikers in the backcountry would do well to test their drinking water before ingesting any at all, especially to measure for the presence of coliform bacteria from plants, insects, and soil.
Taste and some other aesthetic effects can stem from water sources with a high pH or alkalinity that’s too low. Marks from material in hard water can look unappetizing and add an acidic taste to food and beverages prepared with water from that source. Even hot beverages like coffee that require boiling the water first will still likely taste strange if the water source is acidic enough.
The right water testing kit paired with the most convenient water treatment apparatus can prevent illness and keep hikers and campers out in the backcountry as long as they originally planned to stay there. Boiling water can be cumbersome, while most water filters and filtration systems have benefitted from years of development and become tailor-made to the demands of hikers and other backcountry trekkers. Enjoy a cold, fresh, and healthy drink of water whenever you please on your next hiking trip now that you know how to test spring water!
Bonus tip: Curious what these tests look like? Watch these hikers in the U.K. test spring water for alkalinity, TDS, and pH/ionization!

Do you want to make the most of your camping experience in Alaska? Camping is the best way to cherish the mesmerizing Alaskan scenery and be in proximity to Mother Nature with your friends and loved ones.
Are you wondering where to camp, where to go, and what items to pack for an Alaskan camping trip? This article has all the answers regarding camping in Alaska! Moreover, this place comprises a few amazing bewilderments that make it different than other camping locations.
If you’re ready to explore Alaska and be immersed in its camping, here are the top 4 tips for a seamless camping experience in Alaska.
- Be ready for the varying types of weather
The temperature of Alaska is unpredictable. Hence, if you’re camping in summer in blisteringly hot weather, it would be great to carry something waterproof and warm clothes. In your Alaska travel and camping, it’s required to carry your bibbed waterproof rain pants, raincoats, and hip boots.
This is how you don’t worry about the sudden rain and catch fish all day. Moreover, camping without a bathing suit doesn’t seem right! Camping and cruising go hand in hand; hence, a trip to Alaska will help you get the most out of your Alaska trip.
- Pick a campground mindfully
Although you are not mandated to stay at a campground run by the federal government if you wish to go tent camping, it may be the best bet if this is your initial camping trip. Establishing your individual camping place in the bush might feel more adventurous. Still, when camping with small children, you should remain closer to society in case a bear visits your campsite.
When you opt to lease a camping site, you must make your booking ahead because the more renowned campsites might fill up rapidly. Look on the internet for campgrounds near the events and routes you want to visit.
- You will have the option to relax or unwind
Although some corporate Alaska campers provide cable TV and Wi-Fi facilities, none of the federal campsites do. Whether you come here expecting to remain up to date on all the accouterments of technologies (or your beloved TV show), you may feel frustrated. But what if you treat your camping vacation as a time to relax and enjoy the unique stunning scenery surrounding you? It feels exciting.
- Keep the bears at bay
Bears are amazing animals, which doesn’t imply you should invite them with welcoming hands inside your camp. You must be capable of keeping bears away from your campground if you wish to enjoy the woods with them without causing mishaps. Below are a few suggestions:
- You can bypass bear highways by not camping along riverbanks or pathways.
- Do not even camp alone: for your safety, striving to remain close to others would be better.
These are the top 4 tips to enjoy camping in Alaska. What are you thinking of? Dive into the best experiences of camping, and cherish the moments forever. Happy camping!

The quest to find the perfect hiking shoes is never-ending, so the next option we’re going to explore is Duck Boots. Duck Boots have been around for more than 100 years and they’re used for all sorts of outdoor activities, so we can’t discount them as a hiking boot. Let’s dive in a little deeper into what duck boots are, and whether they’re an ideal choice for your next hike.

The legendary Maine-made L.L.Bean Boot was designed by “L.L.” himself in 1912 and has been keeping feet dry and comfortable ever since.
What are Duck Boots?
Duck Boots, also known as Bean Boots, were created by Leon Leonwood Bean, who founded the company L.L. Bean. Bean, who got sick of wet feet during hunting trips, wanted to create a boot that would keep his feet dry while still being ideal for the outdoors. He theorized mixing together two types of boot, combining the rubber sole of a work boot with the leather upper of a casual or hunting boot.
The rubber sole would provide all the necessary protection from the elements, while the leather upper would retain the flexibility and comfort of a regular leather boot. Thus, the Duck Boot was born and became a huge success. Other brands now produce this style of boot, but you can never forget the original waterproof boots.
Related: The 7 Best Two Person Tents

When choosing which hiking boots you should buy, Duck Boots should be considered for their weatherproof design.
What makes a good hiking shoe?
If you’re considering Duck Boots for use as a hiking shoe, you should first know what you’re looking for. There are so many elements to consider when searching for the perfect boot, as there is no one size fits all. Different shoes are optimized for different conditions, different situations you might encounter on the trail, so finding the right shoe isn’t an easy task.
Various terrains put different pressures on your shoes during hikes. This is why hiking boots are usually split into three main categories, each optimized for a different sort of hike. Lightweight hiking shoes (trail shoes), which resemble trainers, are essentially reinforced running shoes. They provide some support, but their main purpose is to be light and breathable while still protecting your foot.
These shoes are designed for day hikes, but they’re actually a favorite among long-distance backpackers. A sturdier shoe would provide more support, but trail shoes are a popular choice long-distance as they aren’t as heavy or constricting as other boots, while still providing enough protection to keep your feet safe and happy during a hike. The only downside of trail running shoes is their lack of ankle support, which leaves you at risk of twisted ankles and other injuries.
Related: The Top 10 New Hampshire Camping Sites
On the other end of the scale are mountaineering boots, designed for terrains which present more of a challenge to traverse. If you’re hiking through rocky territory or icy glaciers, this type of boot provides all the necessary extra protection. They’re much more heavy-duty than hiking shoes, often warmer, water-resistant, abrasion-resistant, and provide much more support to your foot.
Backpacking boots make a compromise between the two, as they aim to keep you prepared for any terrain. For multi-day treks, this type of boot is ideal as it’s durable and supportive enough to carry you through most challenges in the backcountry.
The materials used to construct a hiking boot define it, as the wrong fabric can cause so much suffering for your feet. Finding the right combination of waterproofing and breathability, while still being a comfortable shoe, can present a challenge. That’s why we’re going to break down the material considerations you’ll need to remember when deciding is a shoe is right for hiking.
Also read: The 7 Best Louisiana Tent Camping Sites
Full-grain leather is a very durable and versatile material, so many mountaineering boots are made using this fabric. For rigorous hikes which pass through rough terrains, full-grain leather is fully protective while remaining very comfortable. It has excellent waterproof properties, as well as being warm and highly durable. However, in return for this protection, you have to deal with the increased weight of these heavy-duty boots.
You may have heard the saying “one pound on your feet equals five on your back” and this applies to full-grain leather boots. They may not feel too heavy when you try them on, but five miles down the trail you might find yourself wishing for a lighter shoe. Of course, over rough terrain, the valuable protection full-grain leather provides is well worth the weight, but you don’t need such a heavy shoe for casual hikes.
Split grain leather offers reduced protection, but is more breathable than full-grain leather. It’s still a durable material, but it’s less heavy-duty and has reduced water-resistant properties. It’s often used in combination with synthetic materials, creating a compromise between protection and comfort, and this combination is the most common choice for casual hikers.
Read more like this: Top 10 Outdoor TV Antennas for Rural Areas
Various synthetic materials are used in the construction of hiking shoes, such as nylon and polyester. One benefit of synthetic materials is that they are much easier to break in than leather. These shoes feel lighter and also dry faster, but lack the water-resistant properties of leather. Of course, you can improve the water-resistance, but this can affect the breathability. Check out how to waterproof hiking boots for more information.

Different hiking boots are better suited for different terrains and it’s best to find a pair of boots that fits your adventure.
Also, depending on the type of trekking you do, hiking boots are available in different cuts and heights. Lightweight trail running shoes are often low cut, meaning they end below the ankle. This allows for a wider range of motion but leaves your ankle vulnerable to injury.
Shoes like this are best worn on well-maintained trails, where there’s less risk of trail debris and uneven terrain. Mid-cut boots offer more ankle support and better balance and protection, but the most protective style of boot is high-cut. These boots reinforce your ankle fully and are necessary for off-trail adventures.
Many hiking boots are equipped with devices that provide extra internal support, the purpose of which is to protect both your feet and the soles of your shoes on uneven terrain. One option is shanks, which are 3-5mm thick inserts sandwiched between the midsole and outsole of your boot. These add load-bearing stiffness to hiking boots, which is important to ensure you stay stable and balanced.
Shanks vary in length, some running the whole way down the boot, others just half-way. This feature makes the sole of a hiking boot less flexible, keeping your feet in a mostly flat position.
This may seem counterintuitive balance-wise, but a flexible sole allows your foot to wrap around every root and rock you step on, which can be painful, and tires you out much faster. Having a reinforced sole is a big benefit, but it could make your boot heavier; it all depends on the material the shank is made from.
Related: Top 7 Best Microspikes for Hiking
Some hiking boots feature plates as a form of internal support, which are thin and semi-flexible. These can be used in conjunction with shanks, and they protect your feet from getting bruised by anything you step on.
All hiking boots have rubber outsoles, the part of your boot which spends the most time in contact with the ground. Some have additives such as carbon, which increases the hardness of the material. This is most commonly seen in mountaineering boots for extra durability, but the extra harness of the outsole can mean they feel slick if you go off-trail.
Traction is very important in a hiking boot for obvious reasons, so make sure you get a boot with enough traction to keep you comfortable. If you’re constantly trying not to slip, the increased pressure on your muscles can be painful and even damaging, whereas a boot with a good grip will make your hike so much easier.
Also: 5 Best Pop Up Canopy Tents
So, what makes a good hiking shoe? The ideal footwear for hiking finds the right balance between comfort and protection, and this depends on your own personal hiking preferences. In general, you need a degree of protection from the elements, water resistance, comfort, and breathability. A good hiking boot should protect your foot without hindering your process, and if you make the right choice then your hikes will be so much better for it.

Duck Boots are well-known for their water resistance and ability to be easily cleaned, but are they the best hiking boot option?
Are Duck Boots good for hiking?
Duck boots are constructed using a rubber sole and lower shoe, whilst incorporating a full-grain leather upper. This means Duck Boots have excellent water resistance. Full-grain leather is highly waterproof, as is rubber, so with these shoes, you’ll never have to worry about wet feet.
Of course, Bean Boots claim to be the “original antidote to wet feet”, so water resistance is one thing we know they’re good for. A good hiking boot should always be water-resistant, as there’s a high chance of encountering puddles, streams, and other wet terrains when you’re on the trail. There’s also always the possibility of rain, so even if you step around the puddles, your boots always need to have a good degree of water resistance. If there’s one thing Duck Boots are, it’s waterproof.
Related: Best Gun Brands
L.L. Bean’s Duck Boots use a steel shank for additional support, and this is a great feature for a potential hiking boot. Reducing the flexibility of the sole means more protection for your feet, so this feature of Duck Boots is a big benefit. Remember, this only applies to L.L. Bean’s branded Duck Boots, as there are many other boots of the same style available which might lack this additional internal support.
Duck Boots are known for being very comfortable. Boots are the number one most important piece of equipment for a hiker, and comfort is paramount. If your hiking boots are uncomfortable, it can make you hate every minute you wear them. On the other hand, finding a pair of boots that are comfortable for you is a big first step towards having the right shoe, so regarding comfort, Bean Boots get a pass from us.
Another benefit of Duck Boots is that they’re easy to clean. This isn’t as important as other factors, but after a long hike through muddy and dirty conditions, these boots only need a quick spray from a hosepipe and they’re clean and ready to go.
Also: Sleeping bags for tall people
We’ve covered the benefits of wearing Bean Boots for hiking, and there are a number of reasons you might think they’re a good choice. Duck Boots are highly waterproof, very comfortable, and feature shanks which are a big help towards stability. However, there are some elements of these shoes which might mean they aren’t the best choice for hiking.

While Duck Boots offer great water resistance, their ankle support is not the best which may deter some people from using them for longer hikes.
Why Duck Boots might not be the best choice
Ankle support is a big deal when it comes to hiking boots; as we explained before it can be the difference between a successful hike and a painful injury. Duck Boots are high cut, meaning they rise above your ankles. This means they do provide some support, but it’s minimal, and ideally, a hiking boot would offer more structure around the ankle. For hikers traversing rough terrain, more protection is needed, as if you miss a step in Duck Boots there isn’t much to save you from injury.
Another important thing to consider is traction. Duck boots are designed specifically to handle wet weather, and they do it very well. If you’re in wet, muddy, slushy or otherwise slippery conditions, Duck Boots are ideal, as they have plenty of traction and grip.
However, mud isn’t the only thing which hiking boots have to put up with. On the trails, the traction Bean Boots provides is considerably reduced compared to hiking boots, the difference is noticeable and unfortunately, the traction on the soles of Duck Boots just isn’t strong enough for any sort of serious hiking.
Related: Best screen houses for camping
The materials from which Duck Boots are made make them excellently waterproof. However, rubber and full-grain leather aren’t the most breathable of materials. Although they may do a good job of not letting in water from the outside, they also keep it in.
The lack of breathability here can be very uncomfortable, leading to hot and sweaty feet. This can cause blisters, and for this reason, we would not recommend them as a hiking shoe. All hikers need waterproof boots, but there are others available which won’t make you suffer.
Blisters are something which all hikers have to deal with at some point, but if your boots aren’t breathable then they’re much more likely and threaten to ruin your hike. The best hiking boots keep your feet dry while staying breathable and comfortable, so don’t make an exception here.
If you’re keen on mountaineering, then your hiking boots need to be crampon compatible, which Duck Boots are not. Crampons help with grip when scaling rocky terrain, so having a boot they work with is necessary for safety reasons.
We have no choice but to conclude that L.L. Bean’s Duck Boots are no good for hiking. Although they are comfortable and highly water-resistant, the lack of extra support and breathability means they aren’t the best hiking boot.
A boot specifically designed for hiking could offer the same level of comfort while giving you much more support on the trails. Hiking boots made from Gore-tex would provide the same level of excellent waterproofing while still maintaining breathability, so there are better options out there.

While Duck Boots may not be the best option for hiking, they are still a great overall winter boot.
What are Duck Boots good for?
Although we cannot avoid the conclusion that duck boots are no good for hiking, they’re still an excellent outdoor shoe. Bean Boots are ideal for making your way through snow and slush, so we do recommend this style as a general winter boot.
For any outdoor activity in cold weather, these shoes are ideal, as their warmth and waterproofing will keep your feet happy, while their traction is perfect for walking in the snow. Duck Boots are much closer to snow boots or rain boots than they are hiking, so for these weather conditions, we can whole-heartedly recommend these high-quality shoes.
Other branded duck boots
L.L. Bean was the original creator of the duck boot, but other brands have made their own version. Sperry offers a shoe called the Watertown Duck Boot, and its design is very similar to the original. Sperry’s version boasts a rubber lug outsole with no-slip traction, which could mean improved grip compared to L.L. Bean’s shoe. However, this is still not a hiking sole, so it’s not ideal for outdoor adventuring.
Final Verdict:
So, are Duck Boots good for hiking? The short answer; no. Although Duck Boots make an excellent winter boot, ideal for cold and wet weather, they just aren’t up to the same standard as hiking boots in other areas. The traction Bean Boots provide is optimized for wet conditions, such as snow and slush, but it’s simply not good enough for hiking in the backcountry.
The ankle support is admittedly better than trail running shoes, but more protection is needed if you do anything other than light and easy hikes. For your next hiking trip, Duck Boots aren’t the best choice, even though they’re comfy. If you’re still looking for an outdoor shoe, you might wonder, are Timberlands good for hiking? Read our article on the subject to find out if Timberlands might be the answer you’re looking for.
Bonus tip: To learn more about L.L. Bean’s original legendary boot, check out this interesting video we found below!
Backpacking Gear Reviews & Guides
Bob And Brad C2 Massage Gun Review/The Best Massage Gun for Sports Lovers

Massage guns have become popular in recent years as a way to help people relax and ease pain. They are especially popular among those who enjoy sports, as the massage guns can help to reduce muscle soreness after a workout resulting in faster recovery and improved performance.
Some other benefits associated with the use of massage guns include:
Increased blood flow– Massage guns can help to improve circulation by increasing blood flow, which helps to reduce inflammation and swelling in the muscles. This is especially important for those who are involved in sports or exercise, as increased blood flow can help to repair damaged tissue faster.
Improved flexibility– Massage guns also help to improve flexibility by loosening tight muscles and tendons. This allows the body to move more freely, resulting in improved performance during physical activity.
Reduced stress– The massage gun can also help to reduce stress and anxiety levels. Massaging the muscles helps to release endorphins, which are hormones that act as natural painkillers. By releasing these endorphins, people can feel less stressed and relaxed after using a massage gun.
Relieves pain– Massage guns are great for relieving pain and discomfort, as the vibration helps to loosen tight muscles and release tension. This can help to reduce pain caused by inflammation, arthritis, or other aches and pains.
Enhances performance– Massage guns can help to improve performance when it comes to physical activities, as they help to reduce muscle fatigue and soreness. This helps people perform better in their chosen sport or activity.
Why Choose the Bob And Brad C2 Massage Gun

It’s well known that massage guns are a great way to relieve tension and soreness after a long day or workout. But with so many different massage guns on the market, it can be hard to know which one is right for you. In this Bob and Brad C2 Massage Gun Review, we’ll take a look at the pros and cons of this popular massage gun to help you decide if it’s the right one for you.
If you are an athlete or just someone looking to soothe sore and aching muscles, the Bob And Brad C2 Massage Gun is an ideal choice. This powerful massage gun is designed to provide deep tissue relief through its variety of adjustable speed settings and interchangeable massage heads. The ergonomic design allows for comfortable use during longer sessions, and the lightweight body makes it easy to transport and store. With its powerful motor, the C2 Massage Gun is capable of providing up to 3200 revolutions per minute. With five different intensity levels, this strong force helps to penetrate deep into muscle fibers and provides effective relief from soreness and pain.
The Bob and Brad C2 Massage Gun is designed to help athletes and active individuals recover faster after strenuous activity. It provides a deep-tissue massage that can reduce soreness, improve flexibility, and increase the range of motion in the body. This massage gun also comes with four interchangeable heads for various massaging techniques including a flat head for larger muscle groups, a round head for deeper tissue work, a U-shape for joint relief, and a conical head for smaller areas like the neck or hands. With this variety of massage heads, the C2 helps to target specific areas of discomfort and provides customized relief.

Conclusion
Overall, the Bob And Brad C2 Massage Gun is an excellent choice for those looking for a reliable and powerful massage gun that can provide effective relief from muscle soreness after exercise or long days. With its adjustable speed settings and interchangeable massage heads, it is sure to meet your needs. So if you’re an athlete or just someone looking to give their muscles some well-deserved love and attention, the Bob And Brad C2 Massage Gun is a great investment.

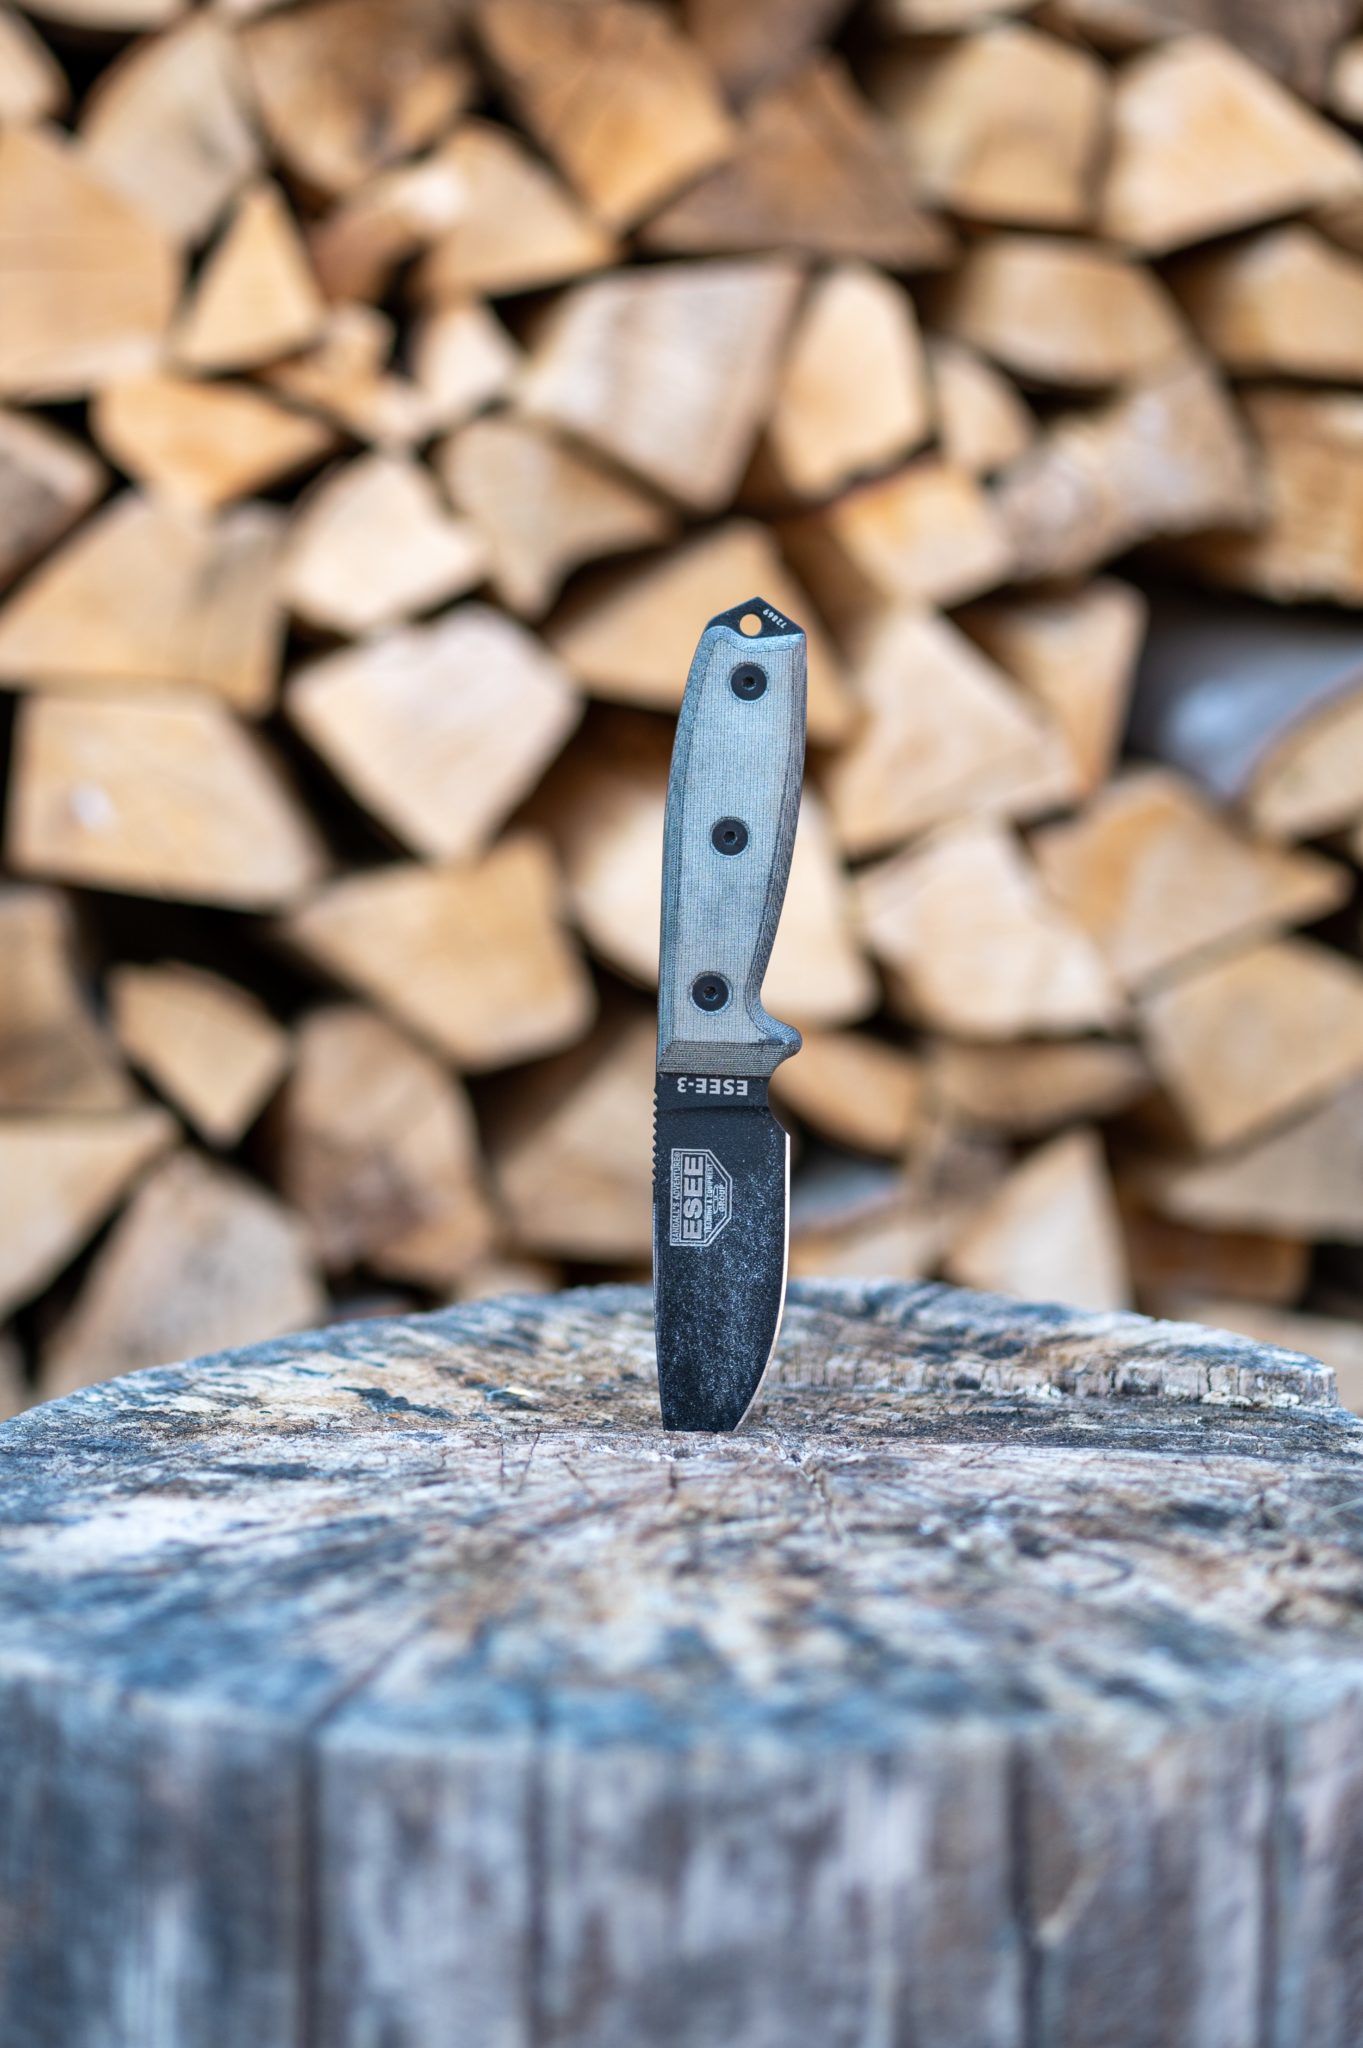
TOP-5 Custom Bushcraft Knives That Can Replace a Camp Hatchet

How to Take Your Own Internet to Outdoor Events

Outdoor Event WiFi: The New Backbone of Open-Air Experiences

Gear You Should Snag for the Great Outdoors This Season

Are You Ready for Autumn Adventures? How to Prep for an Unforgettable Outdoor Fall Guys Trip
BougeRV Showcases Sustainable Innovations at Outdoor Retailer Summer Market 2024

The Evolution of Outdoor Apparel: How Fashion Meets Functionality in the Wilderness

The Role of Camouflage in Wildlife Photography and Hunting
How The Annual REI Dividend Works
Spring Camping Must Haves: BougeRV’s CR Pro 30 and Portable Fridge Innovation

The Perfect Heated Clothing for Different Types of Cold Weather

13 Best Hot Springs in Utah

11 Best Hot Springs in Arizona

12 Best Hot Springs in California

12 Best Hot Springs in Virginia
-
 Outdoor Blog7 years ago
Camping Cots and Air Mattresses: What’s Best for You?
-
 Guns & Shooting Gear Reviews4 years ago
Best Gun Brands – Top 10 Gun Manufacturers in the World
-
 Best in Class Reviews4 years ago
The 7 Best Camping Dinnerware Items
-
 Outdoor Blog6 years ago
5 Useful Items To Have When You’re Out On Your Hunting Trip
-
 Best in Class Reviews6 years ago
The 7 Best Fixed-Blade Survival Knives – Tested & Reviewed
-
 Best in Class Reviews4 years ago
7 Great Sleeping Bags for Tall People – 2023 Review
-
 Backpacking Gear Reviews & Guides5 years ago
7 Best Solar Panel Trail Cameras – Reviewed
-
 Best in Class Reviews4 years ago
Top 7 Best Microspikes for Hiking – 2023 Review